Images
An image defines a virtual machine image that encapsulates cloud-specific information. All application components must eventually reference an image that can be provisioned in the selected cloud(s).
In this section you’ll learn how to:
- Reference cloud-specific images,
- Change the resource allocations,
- Define the security group, and
- Deploy an image through SlipStream.
“Native” Images
To have full application portability between clouds, you must have identical or functionally equivalent virtual machine images available in each of the clouds.
Identical Images
One possibility is to create your own virtual machine images and upload them into every cloud you want to use. In theory, this is the best approach. In practice as with so many ideas, it doesn’t work well because:
- Some cloud providers do not allow user-created images,
- Other cloud providers modify uploaded images (e.g. by changing the kernel), and
- Maintaining images for every cloud becomes a significant burden.
The last point is particularly troublesome because making images (often tens of Gigabytes in size) and uploading them is time-consuming. By doing this, we’d lose the dynamicity that is a fundamental for switching to cloud technologies.
Identical Recipes
SlipStream’s approach overcomes these problems by reusing existing, functionally equivalent images supplied by the cloud providers, then maintaining common recipes for customizing them.
A SlipStream image definition references existing (“native”) virtual machine images in each cloud, creating a group of functionally equivalent images (e.g. a “minimal Ubuntu 14.04” image). The slight differences between the images in various clouds rarely (if ever) have noticable effects on the cloud application and we free ourselves from maintaining our own images.
If you look at the definition of the examples/images/ubuntu-14.04 image, you’ll see the list of native image identifiers in each cloud in the “Cloud Image Identifiers and Image Hierarchy” section.
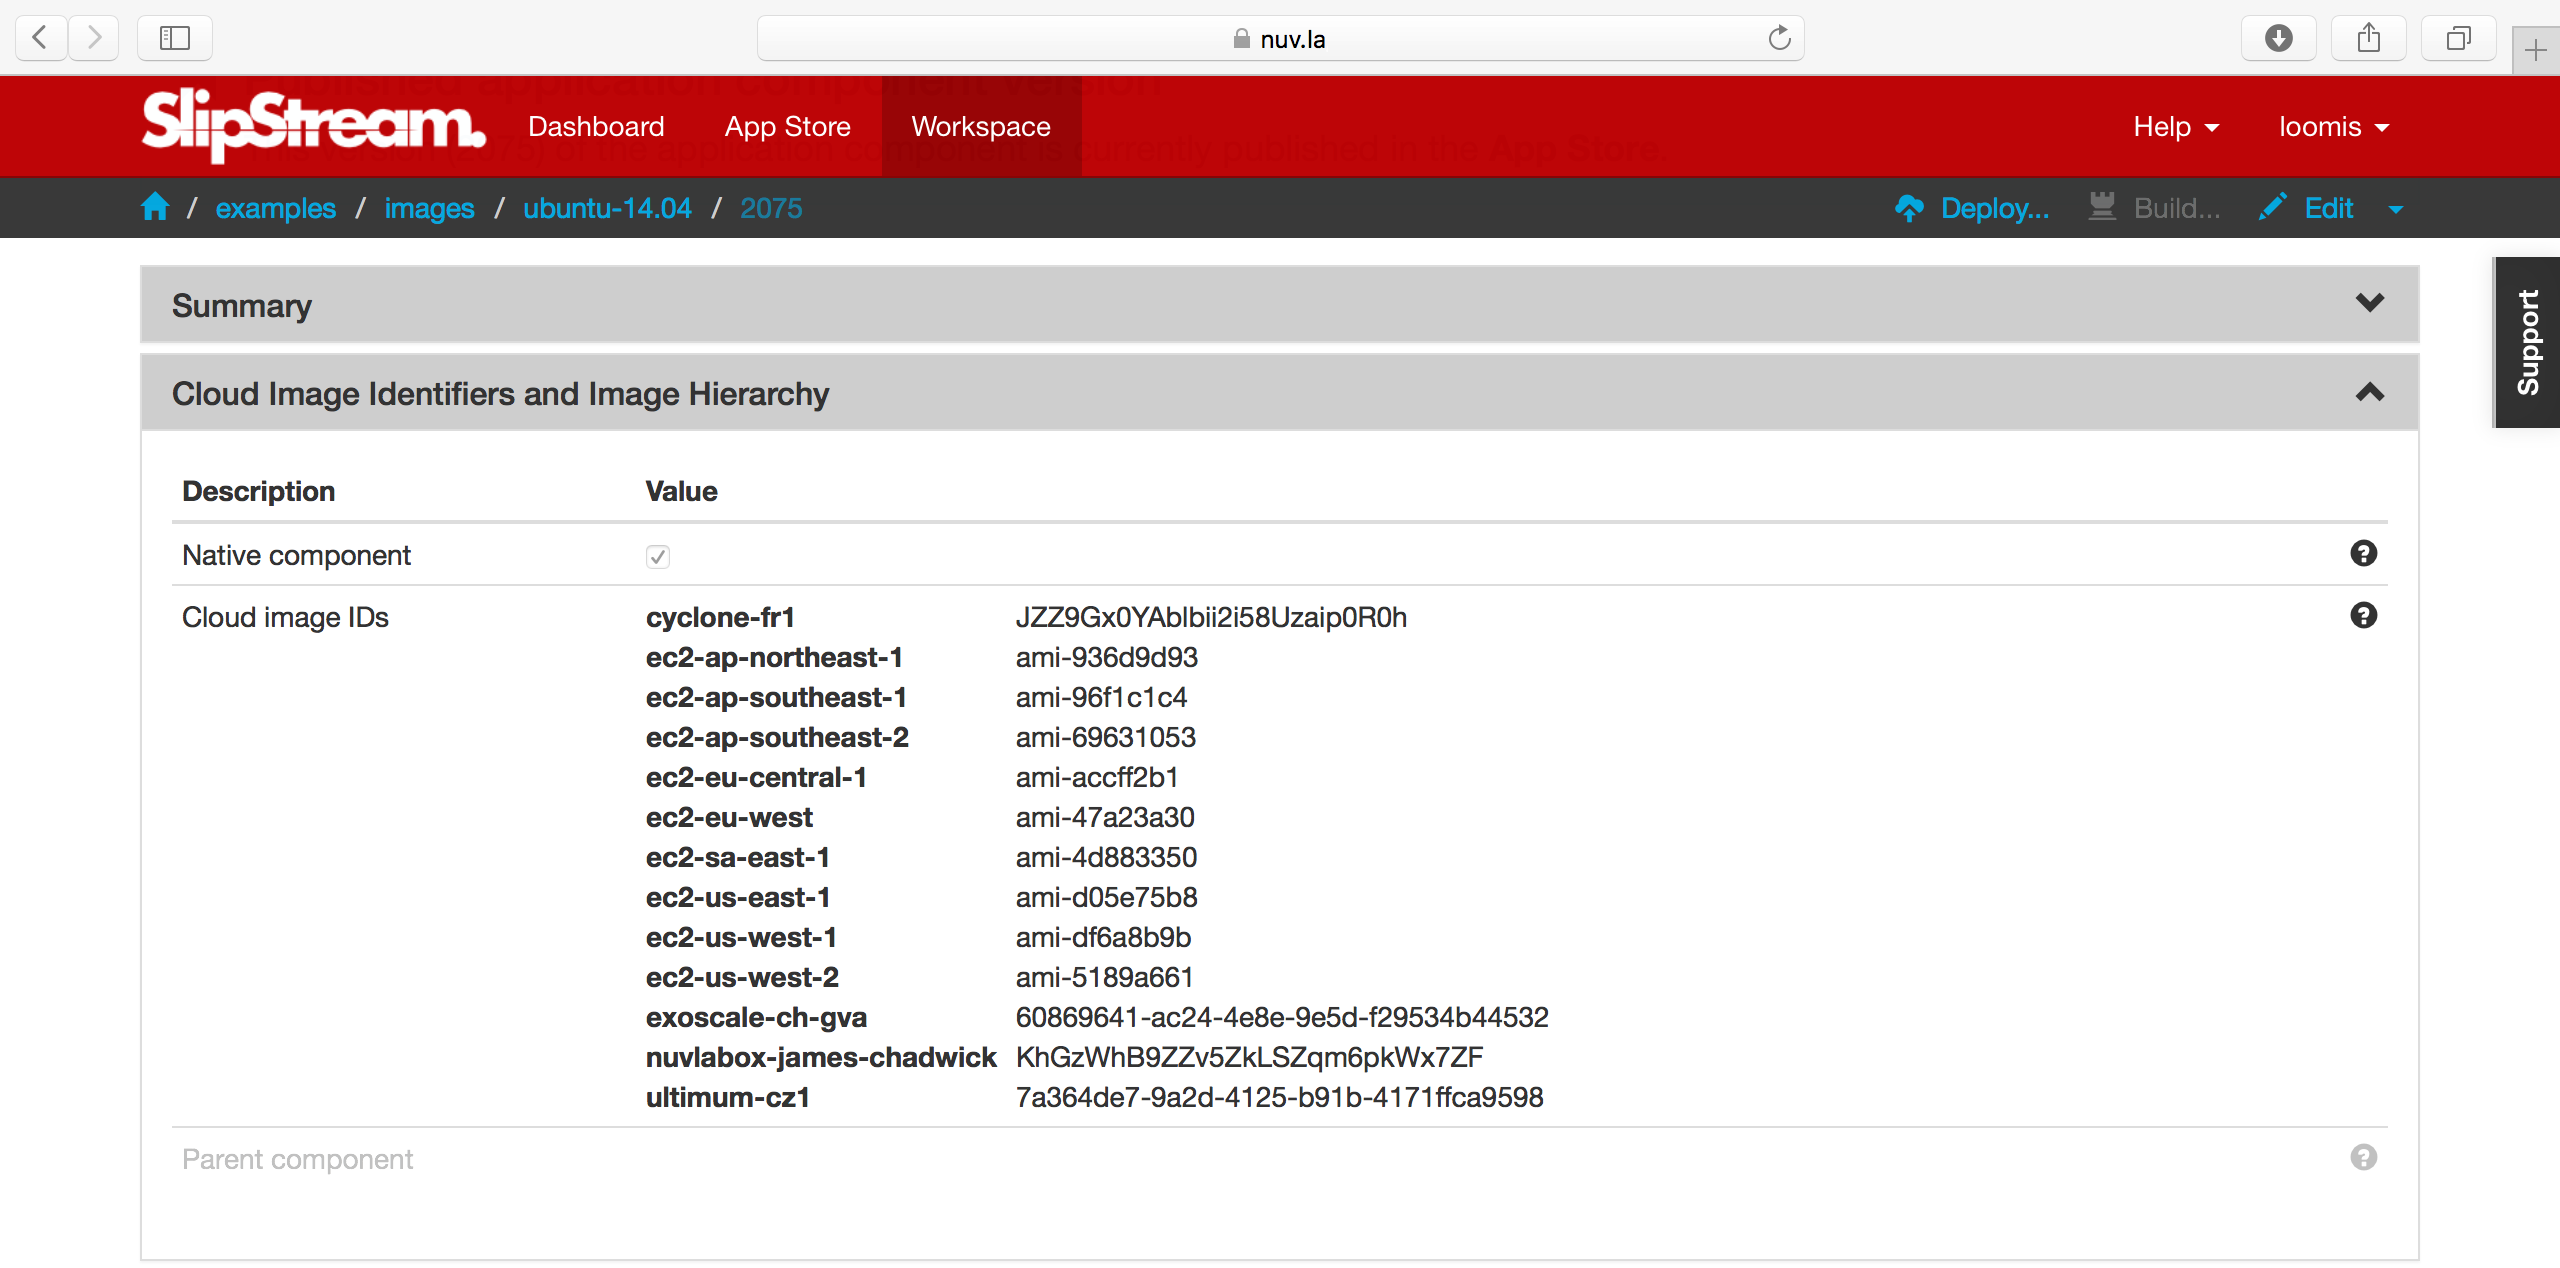
When creating a new image, you’ll need to find the appropriate image identifiers through the cloud provider’s interface. For Exoscale, the identifiers are available from a separate web page .
VM Size
Very often you will want to tailor the CPU, RAM, and other resources allocated to the machine. Specifying the “size” of a virtual machine is another area where the cloud providers differ. Within an image, the size is defined, per-cloud, in the “Cloud Configuration” section (see examples/images/ubuntu-14.04).
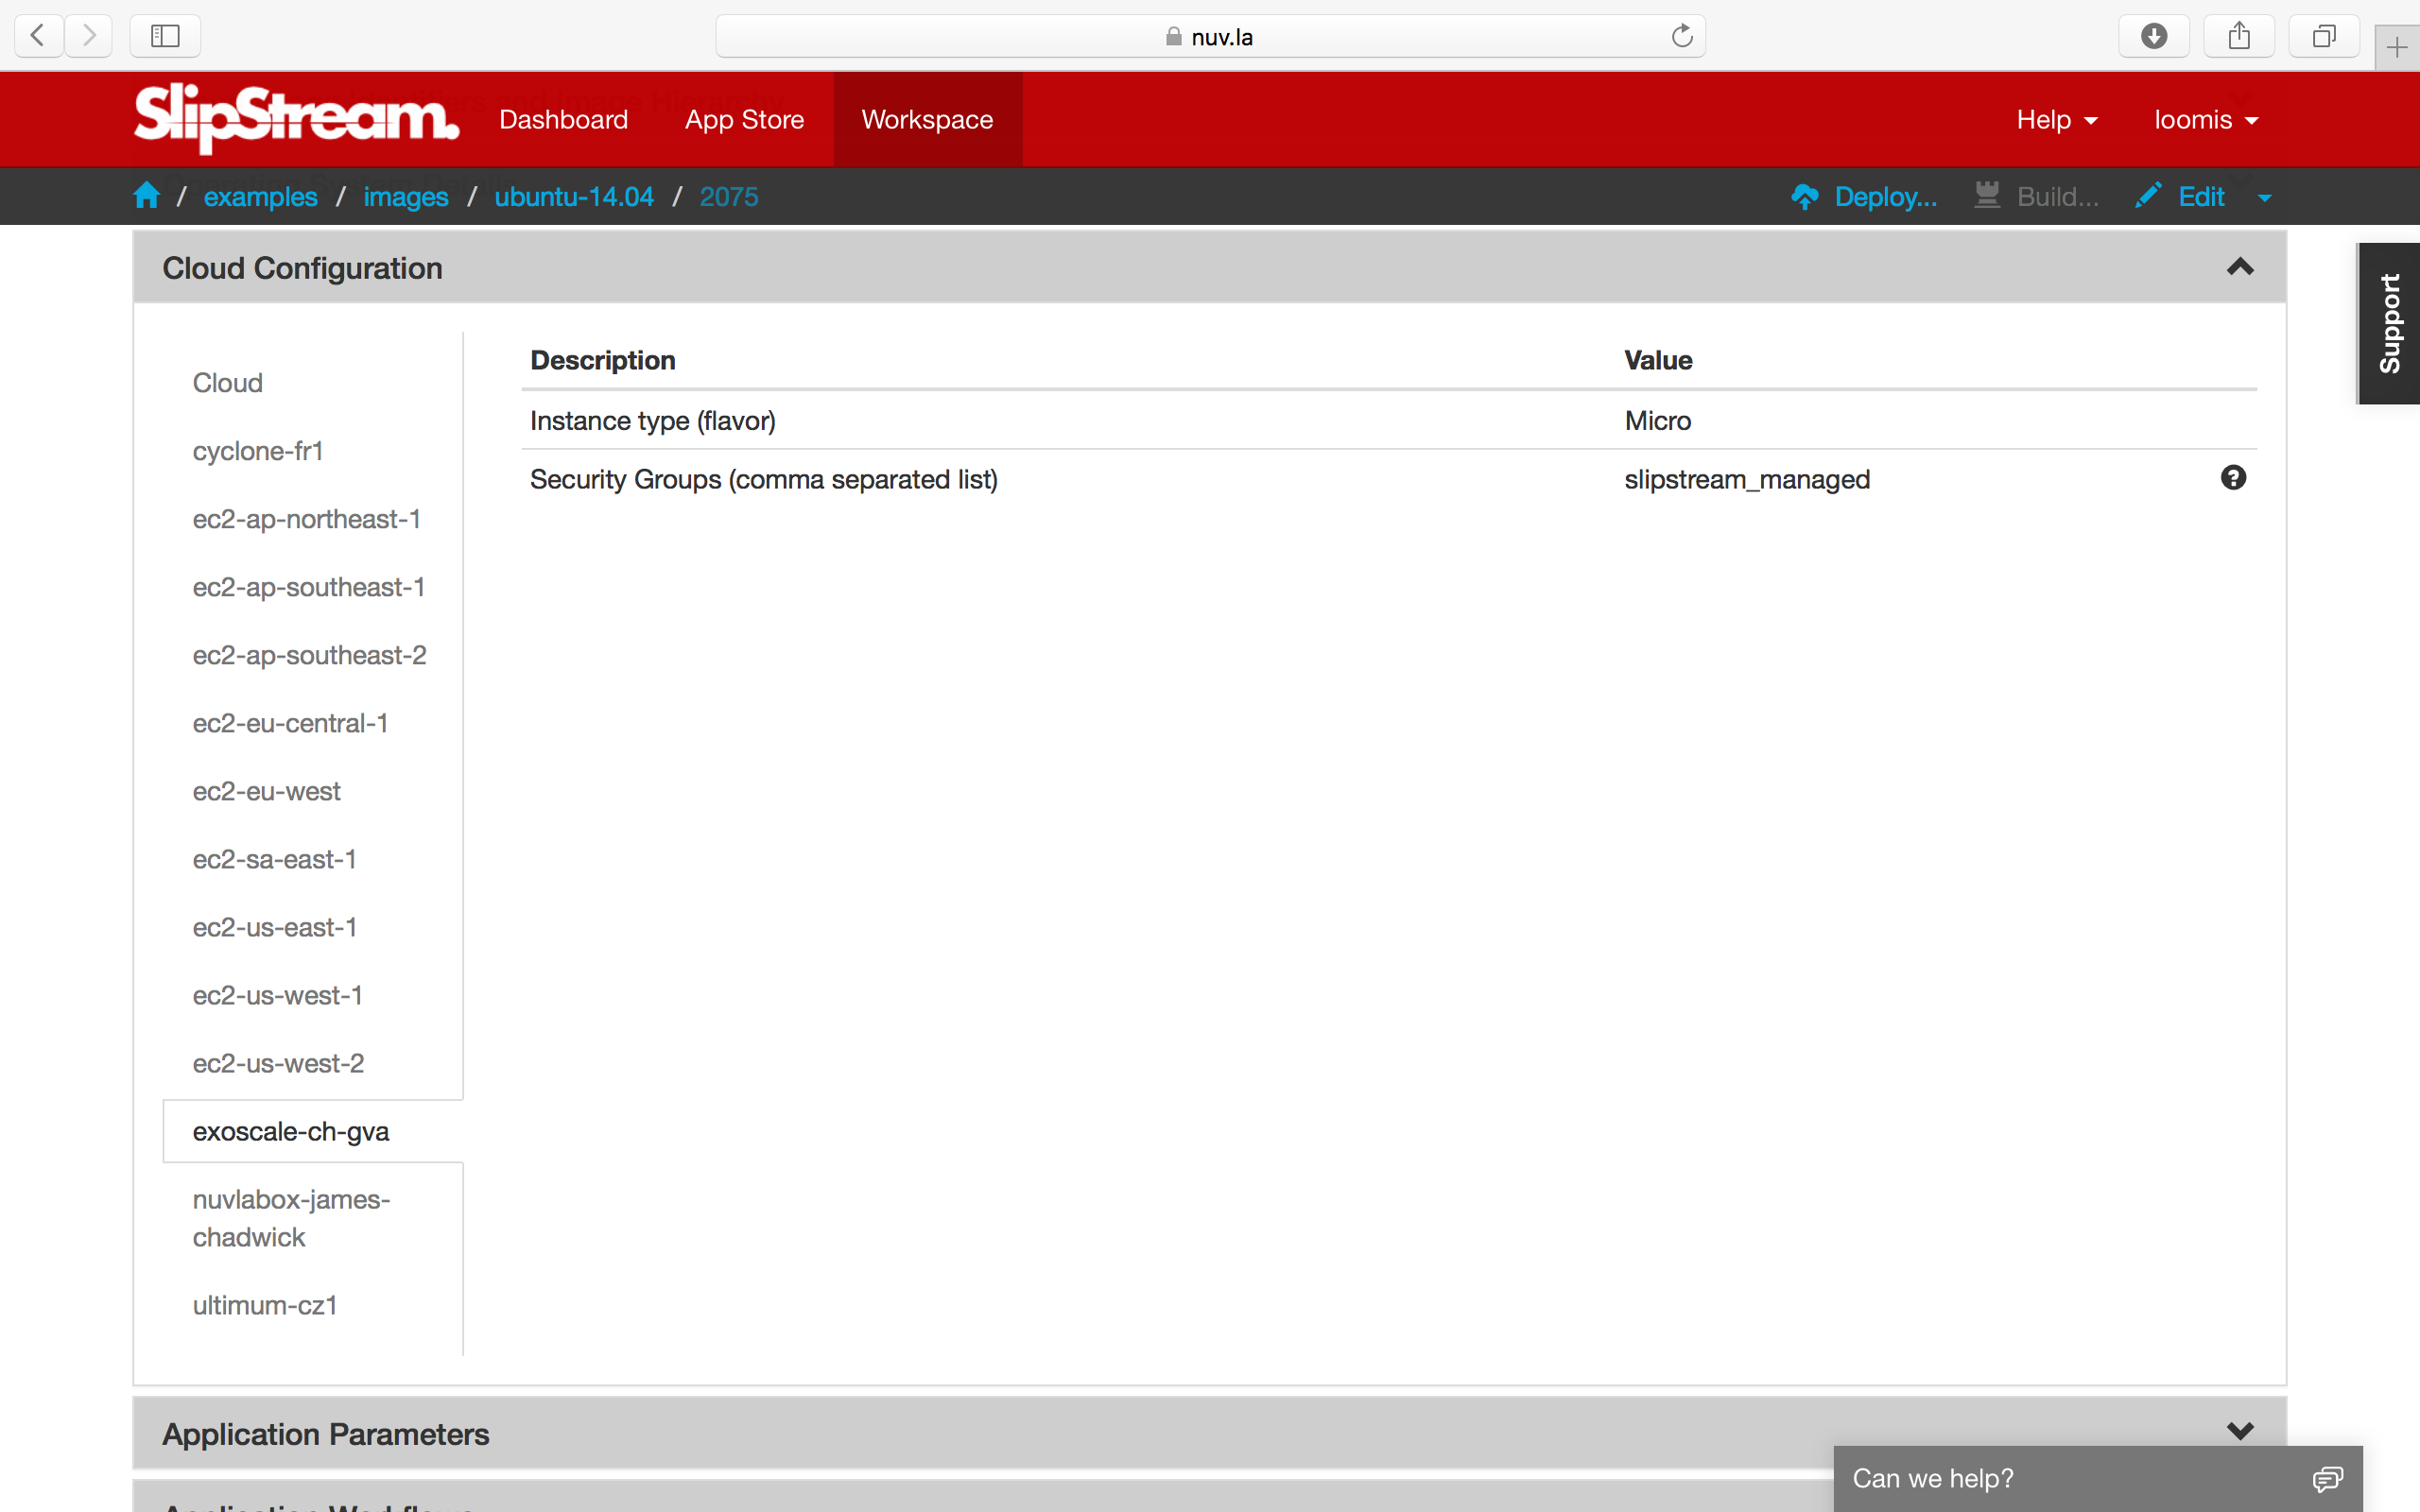
Some providers allow you to specify the CPU and RAM resources explicitly; others only allow you to specify a “t-shirt” size. You will have to consult documentation from the cloud providers to understand the allowed values and their meanings. The following table shows the differing sizes for Exoscale and Ultimum (just another cloud brought here for a comparision).
| Exoscale | Ultimum | CPU | RAM (GB) |
|---|---|---|---|
| Micro | – | 1 | 0.5 |
| Tiny | Basic | 1 | 1 |
| Small | Standard | 2 | 2 |
| Medium | – | 2 | 4 |
| – | Standard Plus | 4 | 4 |
| Large | – | 4 | 8 |
| Extra-large | – | 4 | 16 |
| – | Large | 8 | 8 |
| Huge | – | 8 | 32 |
| – | Large Plus | 16 | 16 |
| – | Extra Large | 32 | 32 |
You will not be able to change the resource allocation for image definitions for the shared images (or more generally for any image not owned by you). However you can get around this by:
- Making a copy of the image within SlipStream and modifying your copy, or
- Updating the size in the components you create that reference a shared image.
We will see how values can be inherited or changed when we see what can be done with components.
Networking
Currently SlipStream takes a very simple approach to managing network connectivity to virtual machines. On clouds that support it, SlipStream will create a security group (set of cloud-level firewall rules, not VM Operating System firewall rules) called “slipstream_managed” that allows access on any port from anywhere.
When you use the standard shared image definitions, the “slipstream_managed” security group will be used, allowing the services on the machine to be accessed through the network. Note on the previous screenshot that there is a parameter to specify what security group(s) to use.
You can more tightly secure your deployed applications by:
- Running a firewall within your images (and components) and/or
- Specifying a different security group in your image definitions (the referenced security groups should be present on the cloud).
In production, you should take every opportunity to secure your running systems. In the interests of simplicity, this tutorial does not follow best practices in this respect.
Important
If you do specify your own security group in your images, you need to maintain the same security group on all the clouds you use to ensure that you can switch between clouds easily.
Important
For clouds that do not support security groups (or their equivalent), you must manually adjust the networking parameters for the machines that are deployed.
Deploy a VM
At its simplest, SlipStream can be used as a multi-cloud VM management
console. To show how this is done, navigate to the examples/images
project, which contains a set of minimal images you can use.
Clicking on the ubuntu-14.04 module and then on “Deploy…”, you
should see a screenshot like the following.

From the run dialog you can choose the cloud to use and then deploy the image by clicking on the dialog’s “Deploy…” button. This will redirect you to the dashboard, where you will see a new entry for the image.
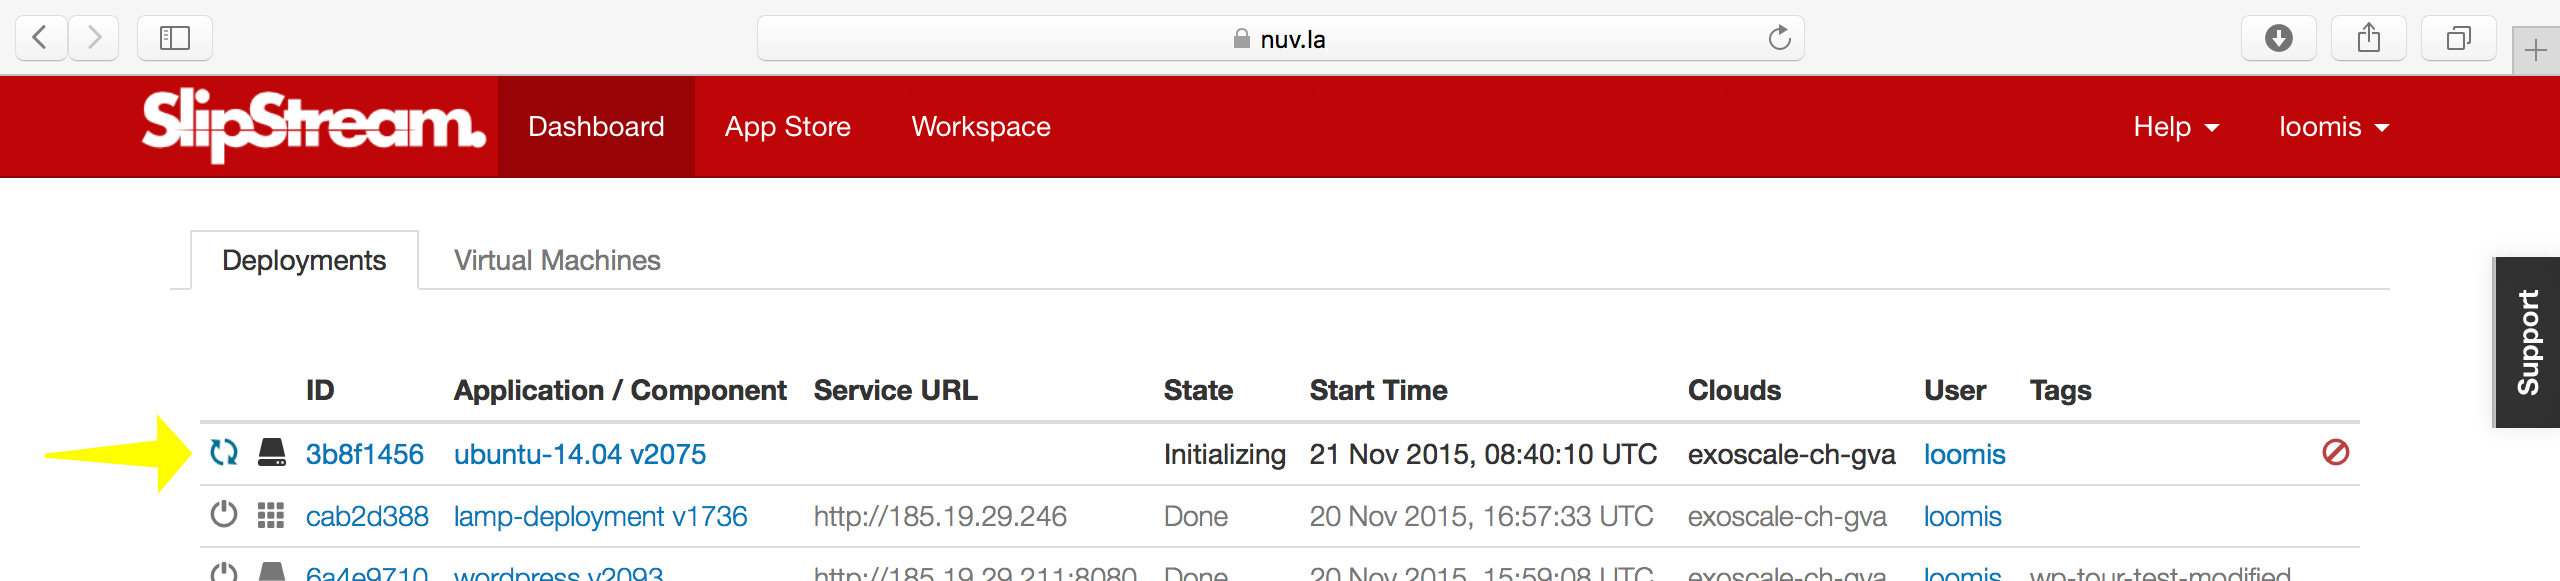
You can either follow the progress of the machine from the dashboard or click on the “ID” to see the more detailed run page. On the run page, you can find the IP address of the machine and an SSH link in the “machine” section.
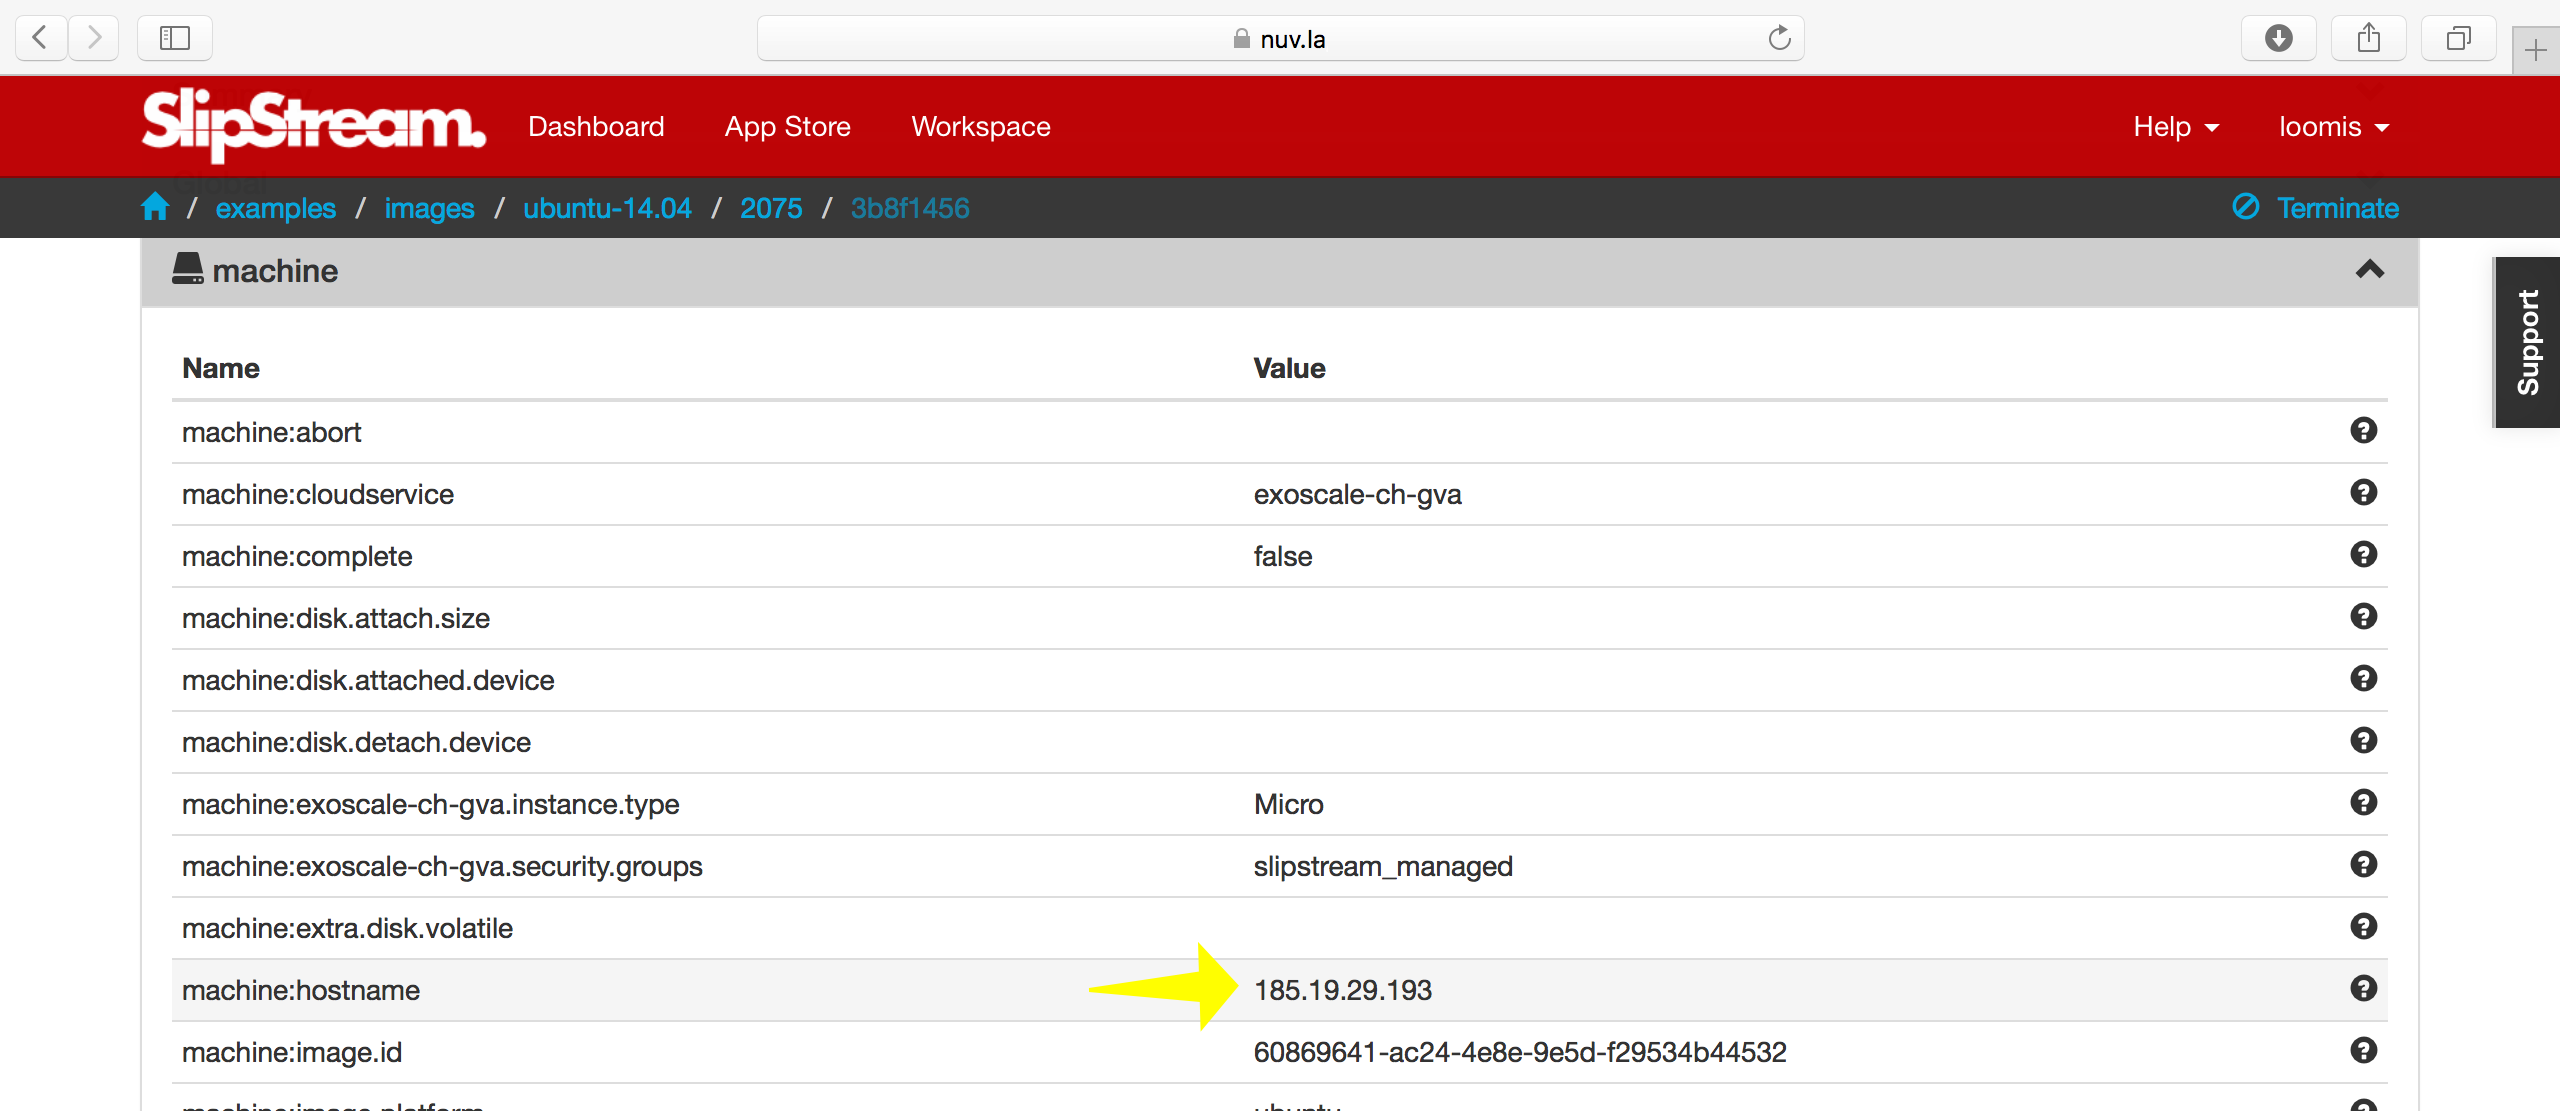
Or you can log in manually from the command line, using the username and IP address on the run page:
advanced_tutorial> ssh root@185.19.29.193
[...]
Welcome to Ubuntu 14.04.2 LTS (GNU/Linux 3.13.0-49-generic x86_64)
[...]
root@machine3b8f1456-cb5d-49ba-b7d5-430f97642850:~#
Or if your browser is configured for SSH links, you can click on the link for the parameter “machine:url.ssh”.
Important
Note that the username may change depending on the underlying native image being used. The usernames “root” and “ubuntu” are common. The username may not be correct in the parameters as they are not always uniform across cloud providers.
Running simple virtual machines in this way is often useful for quick debugging or developing service installation recipes.
EXERCISES
- Create a copy of the Ubuntu 14.04 image and change the size for either
Exoscale exoscale-ch-gva or exoscale-ch-dk. Leave the other unchanged.
- Deploy the copy on both Exoscale exoscale-ch-gva or exoscale-ch-dk. Note
the deployment times.
Verify that you can log into both machines with SSH.
Verify that the number of CPUs (
/proc/cpuinfo) and the RAM (/proc/meminfo) are the values expected from the size.Try to deploy and access a web server on the deployed machine. The commands to use are:
$ apt-get update
$ apt-get install -y nginx
$ service nginx start
You should then be able to navigate to “http://ip_address/” and see an nginx welcome page. You may have to add
sudobefore these commands, if you had to log in with the “ubuntu” account rather than “root”.