Applications
Although some useful applications can be deployed as single machines, most applications nowadays are large, multilayer beasts with several different functional blocks. The typical 3-tiered web application falls into this category with its load balancer, application front-ends, and database, usually all with redundancy and failover.
In this section, we will build our first multi-node application. You will learn how to:
- Combine your components into multi-machine deployment
- Connect parameters between application components
- Coordinate the configuration of the components
- Change the number of machines deployed
- Spread a deployment between clouds
Application Definition
An application is a set of nodes (that are tied to component definitions) that will be deployed together. The application will also define the mapping between the input/output parameters of the nodes that are tied together as well as the multiplicity of each node.
Create a new application definition in your home project. The first section of the new application page just asks for generic information.
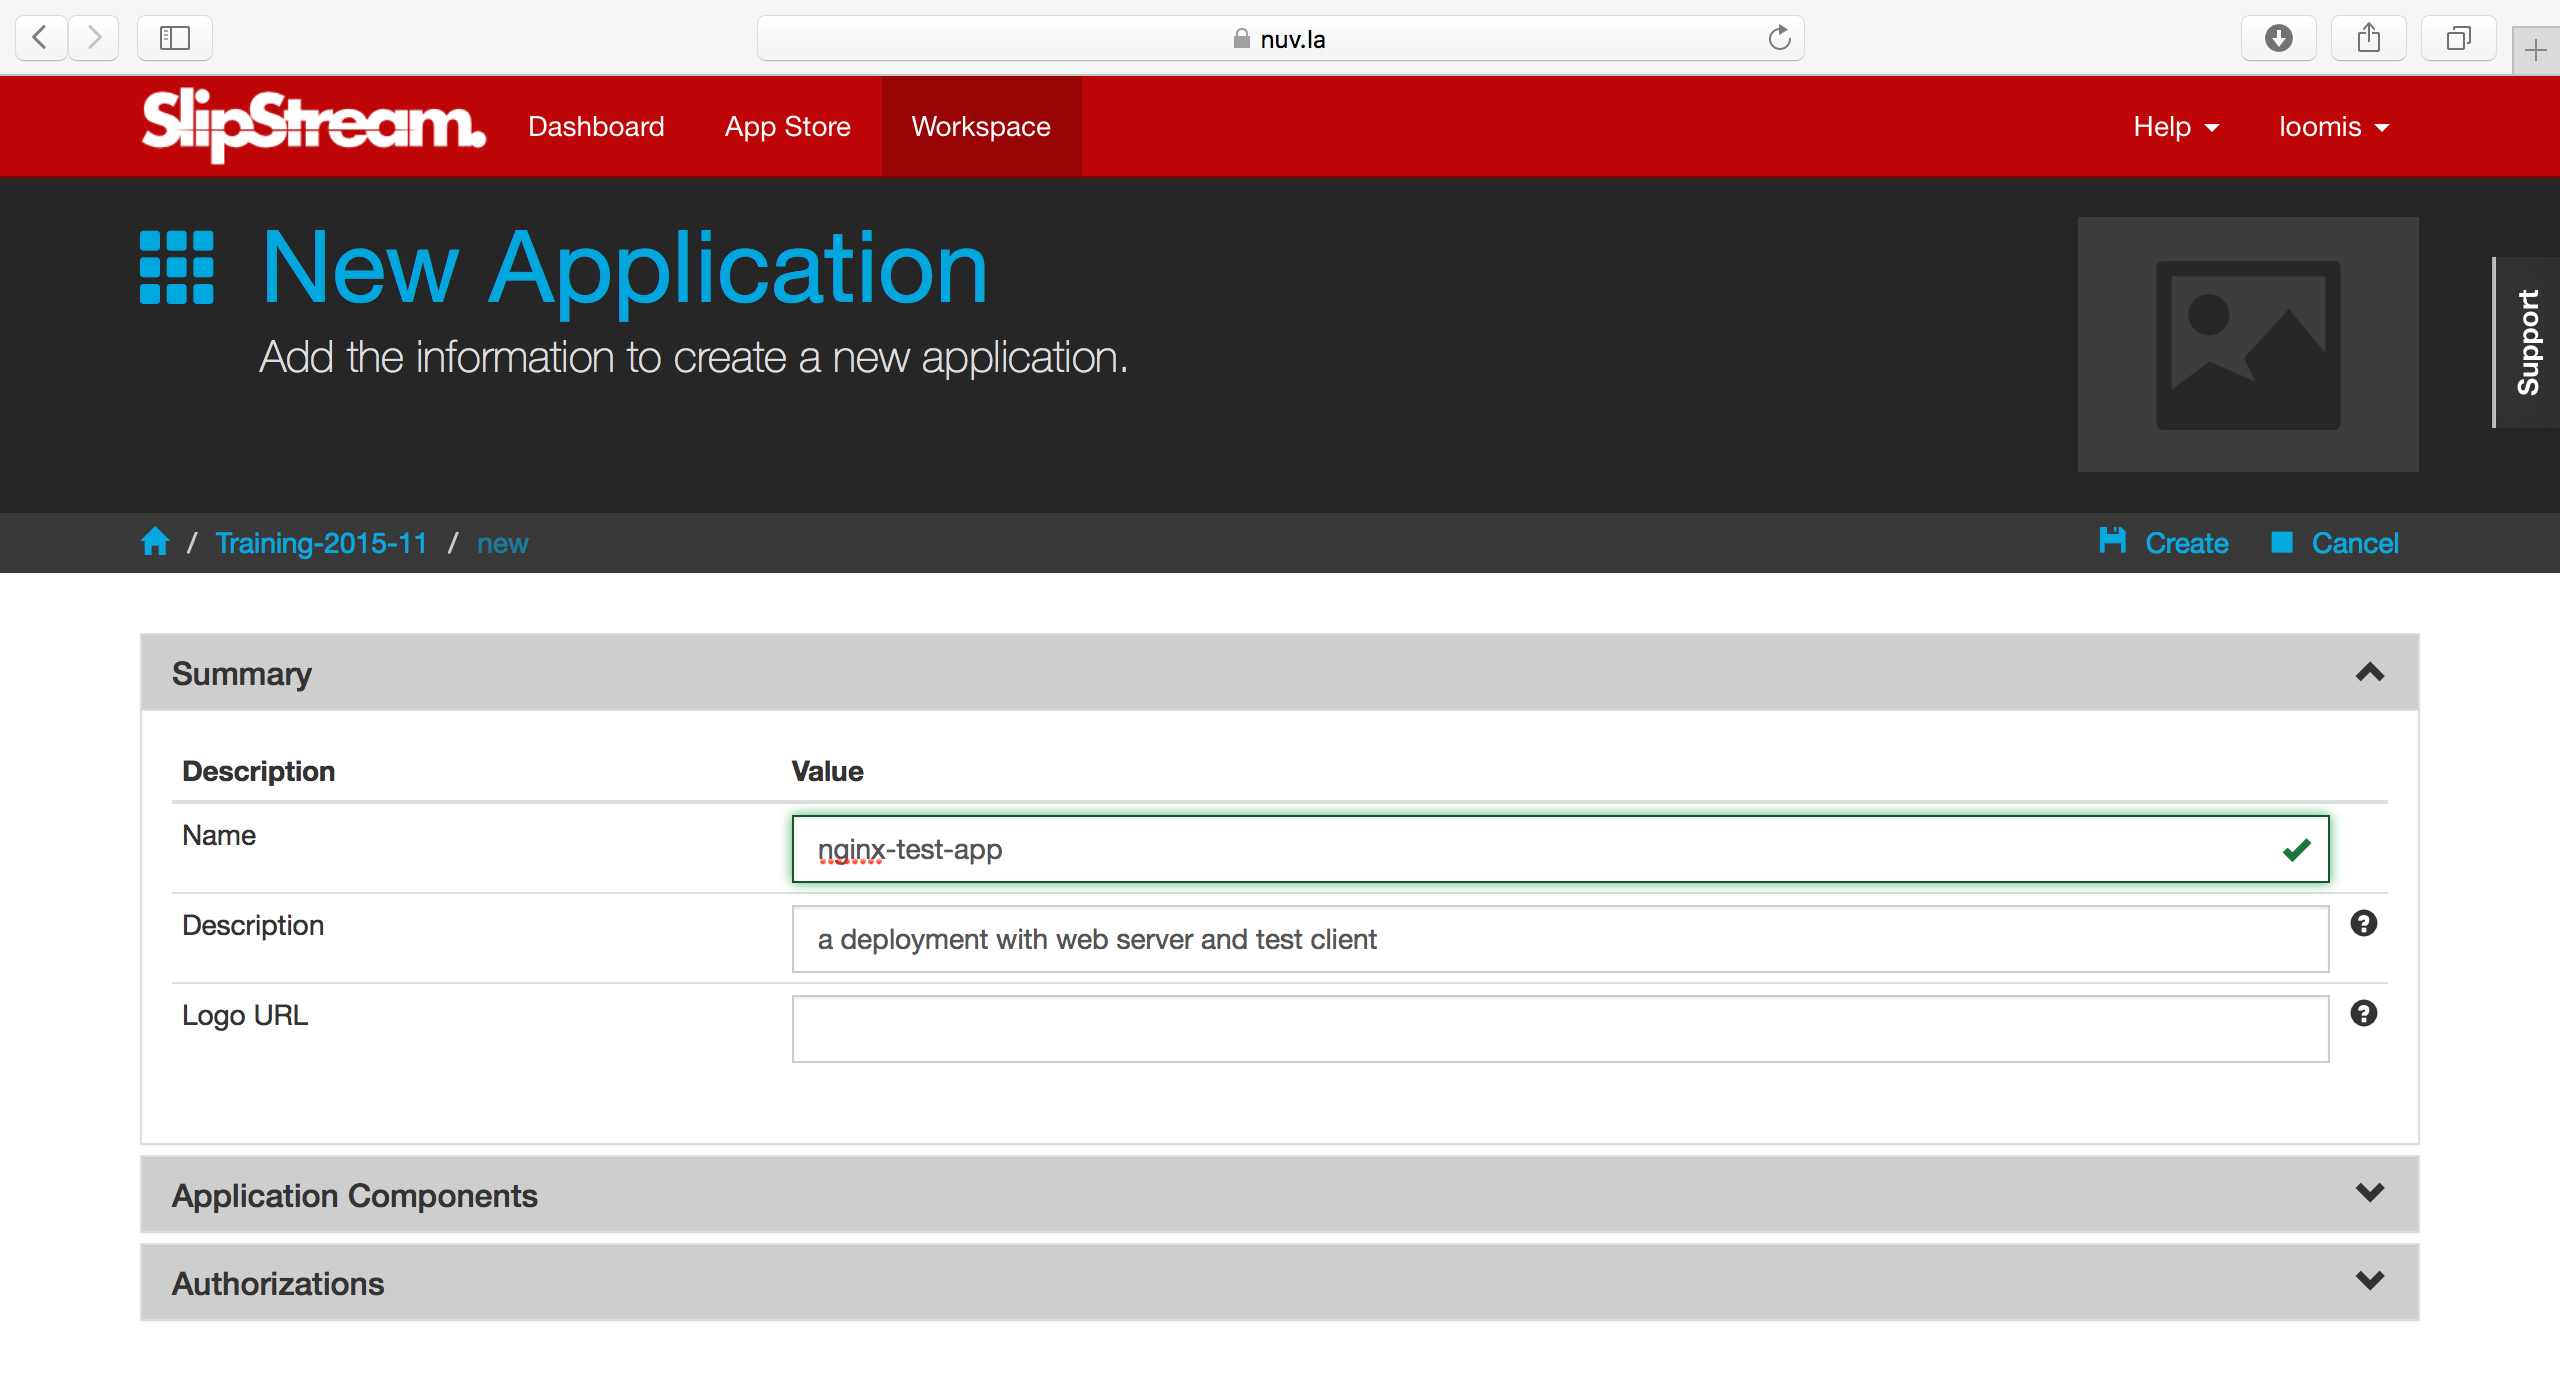
The second section provides information about the nodes that will comprise the full application deployment. If there are input parameters for a node, then you can set the values here or provide a link to another node’s output parameter.
Add two nodes for this deployment, the web server and the test client.
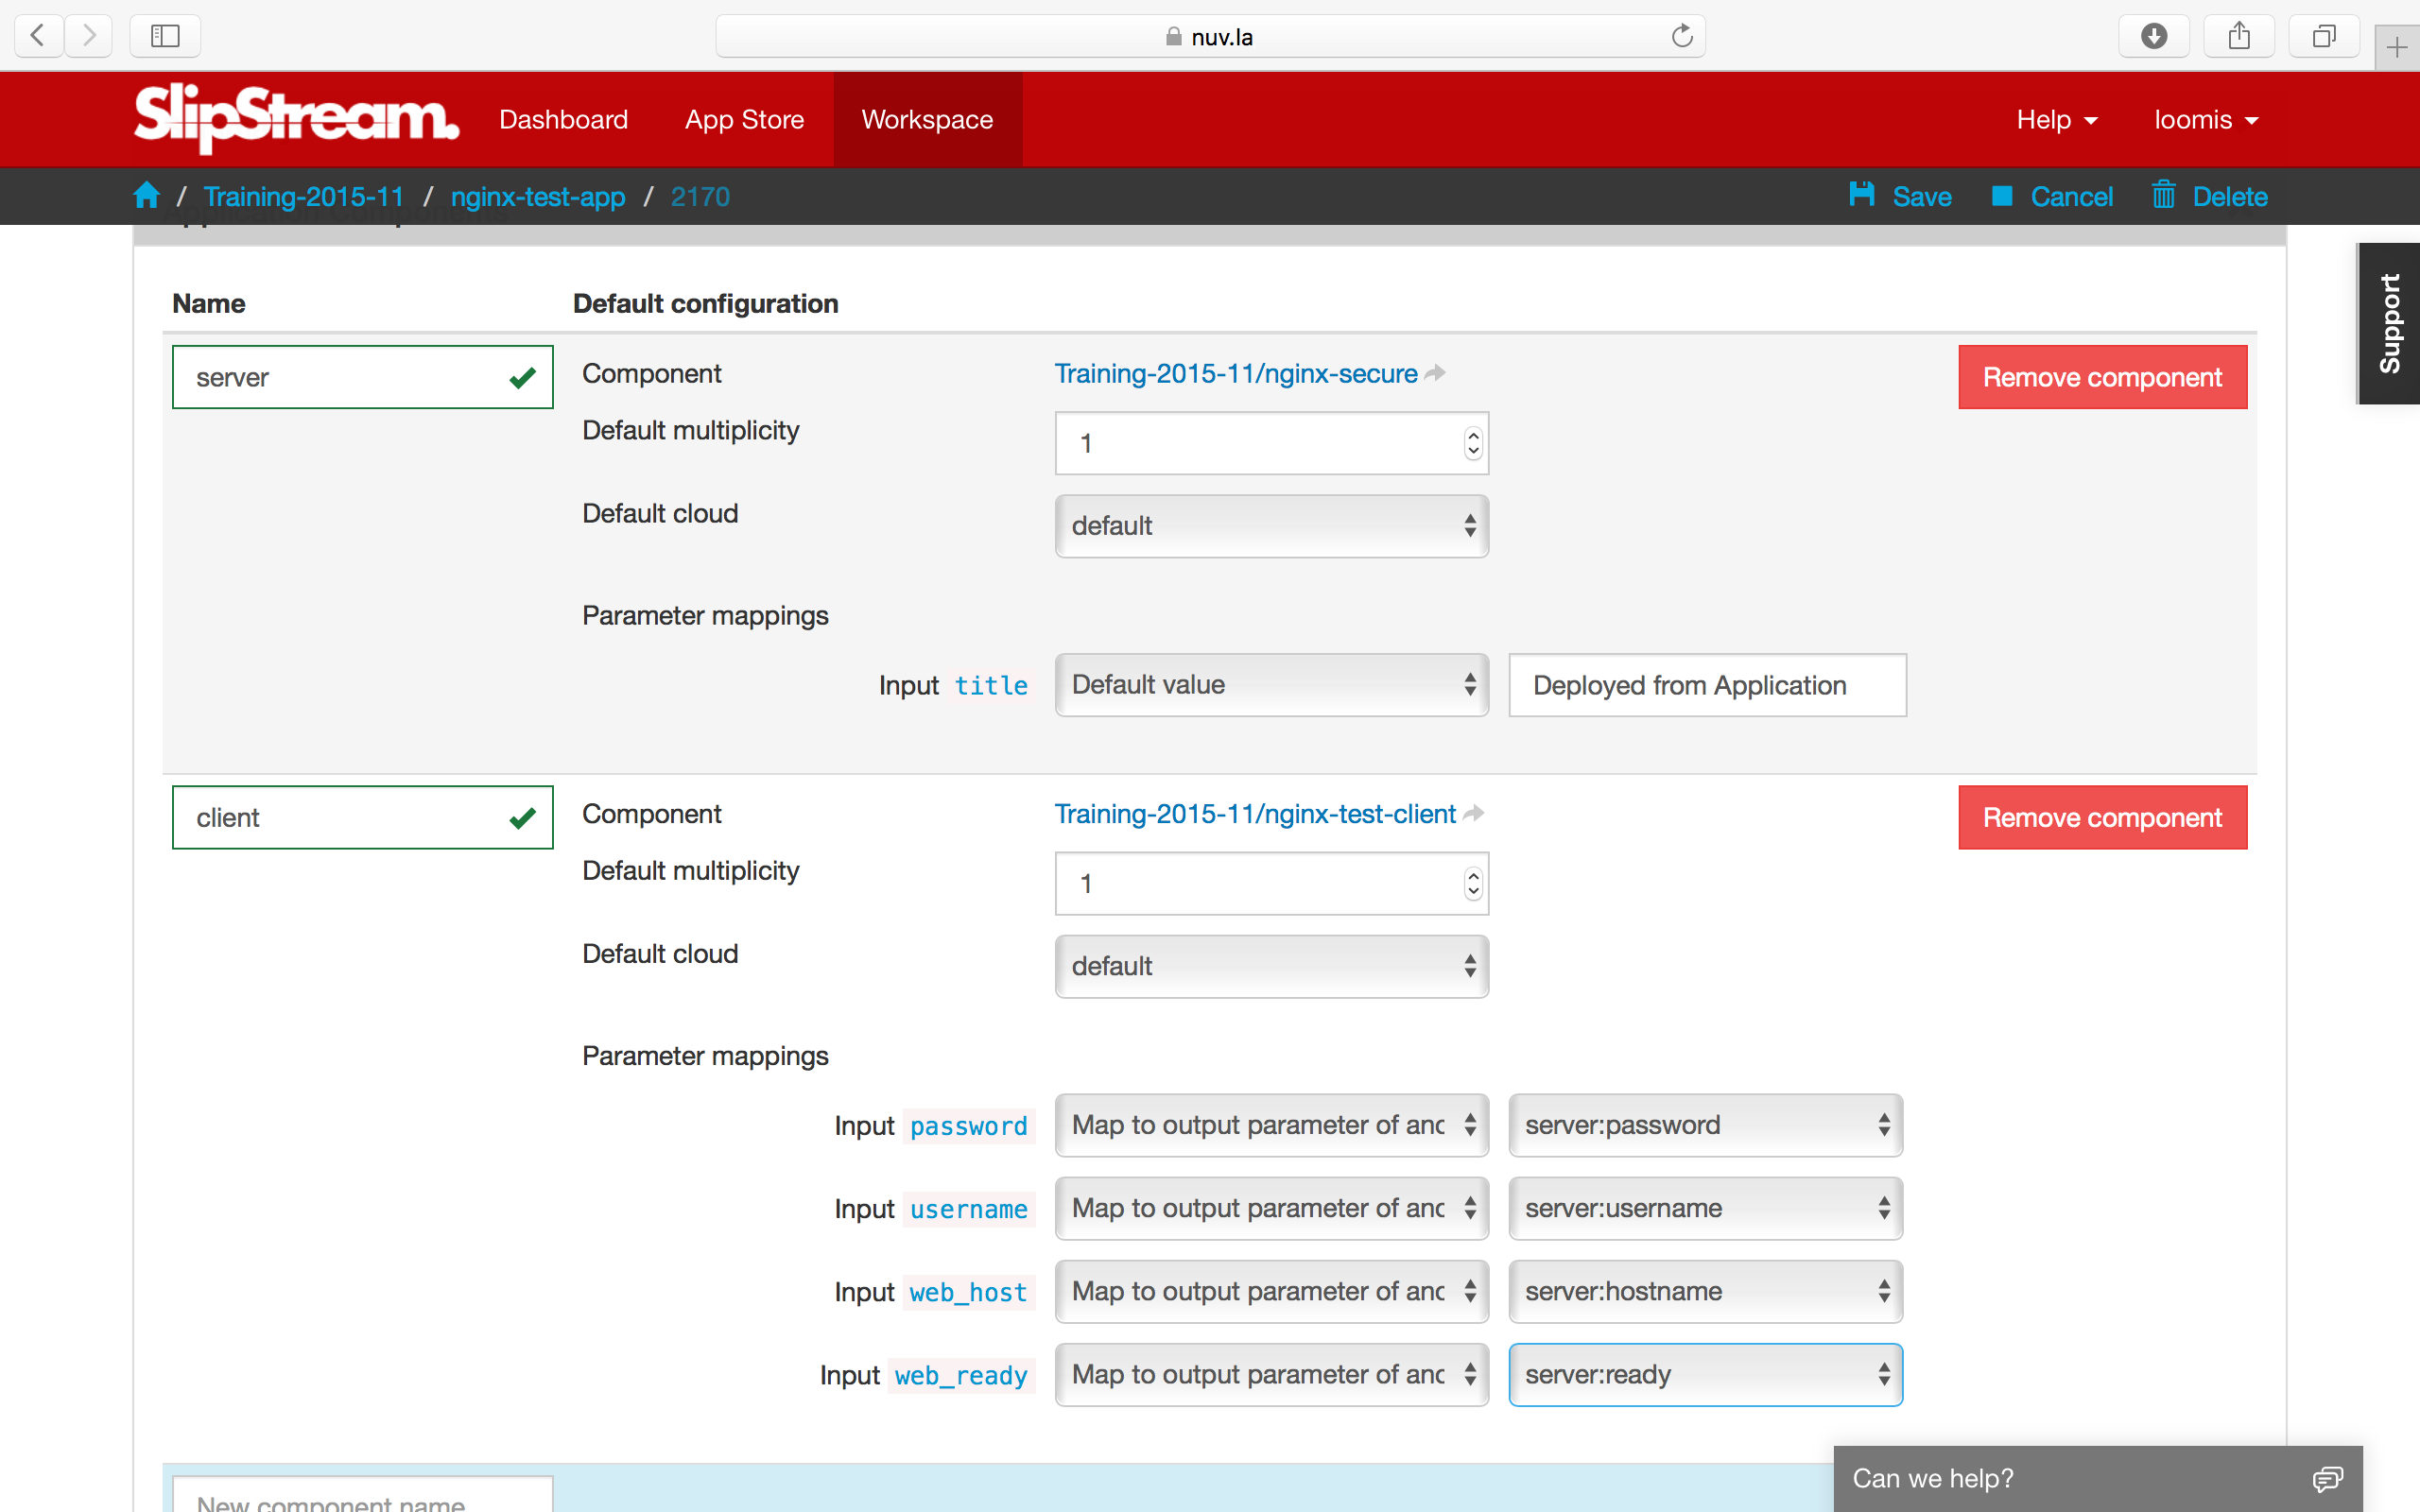
There are several important things to notice about the application definition. You can:
- Add any number of different components to the application.
- Define the default multiplicity for each node (default is 1).
- Define the cloud to use for the node (although you usually want to use “default”).
- Tie output parameters from one node to the input parameters of another.
Deploying the Application
Now that the application has been defined, you can deploy the full application by clicking the “Deploy…” button. Doing so will bring up the usual run dialog.
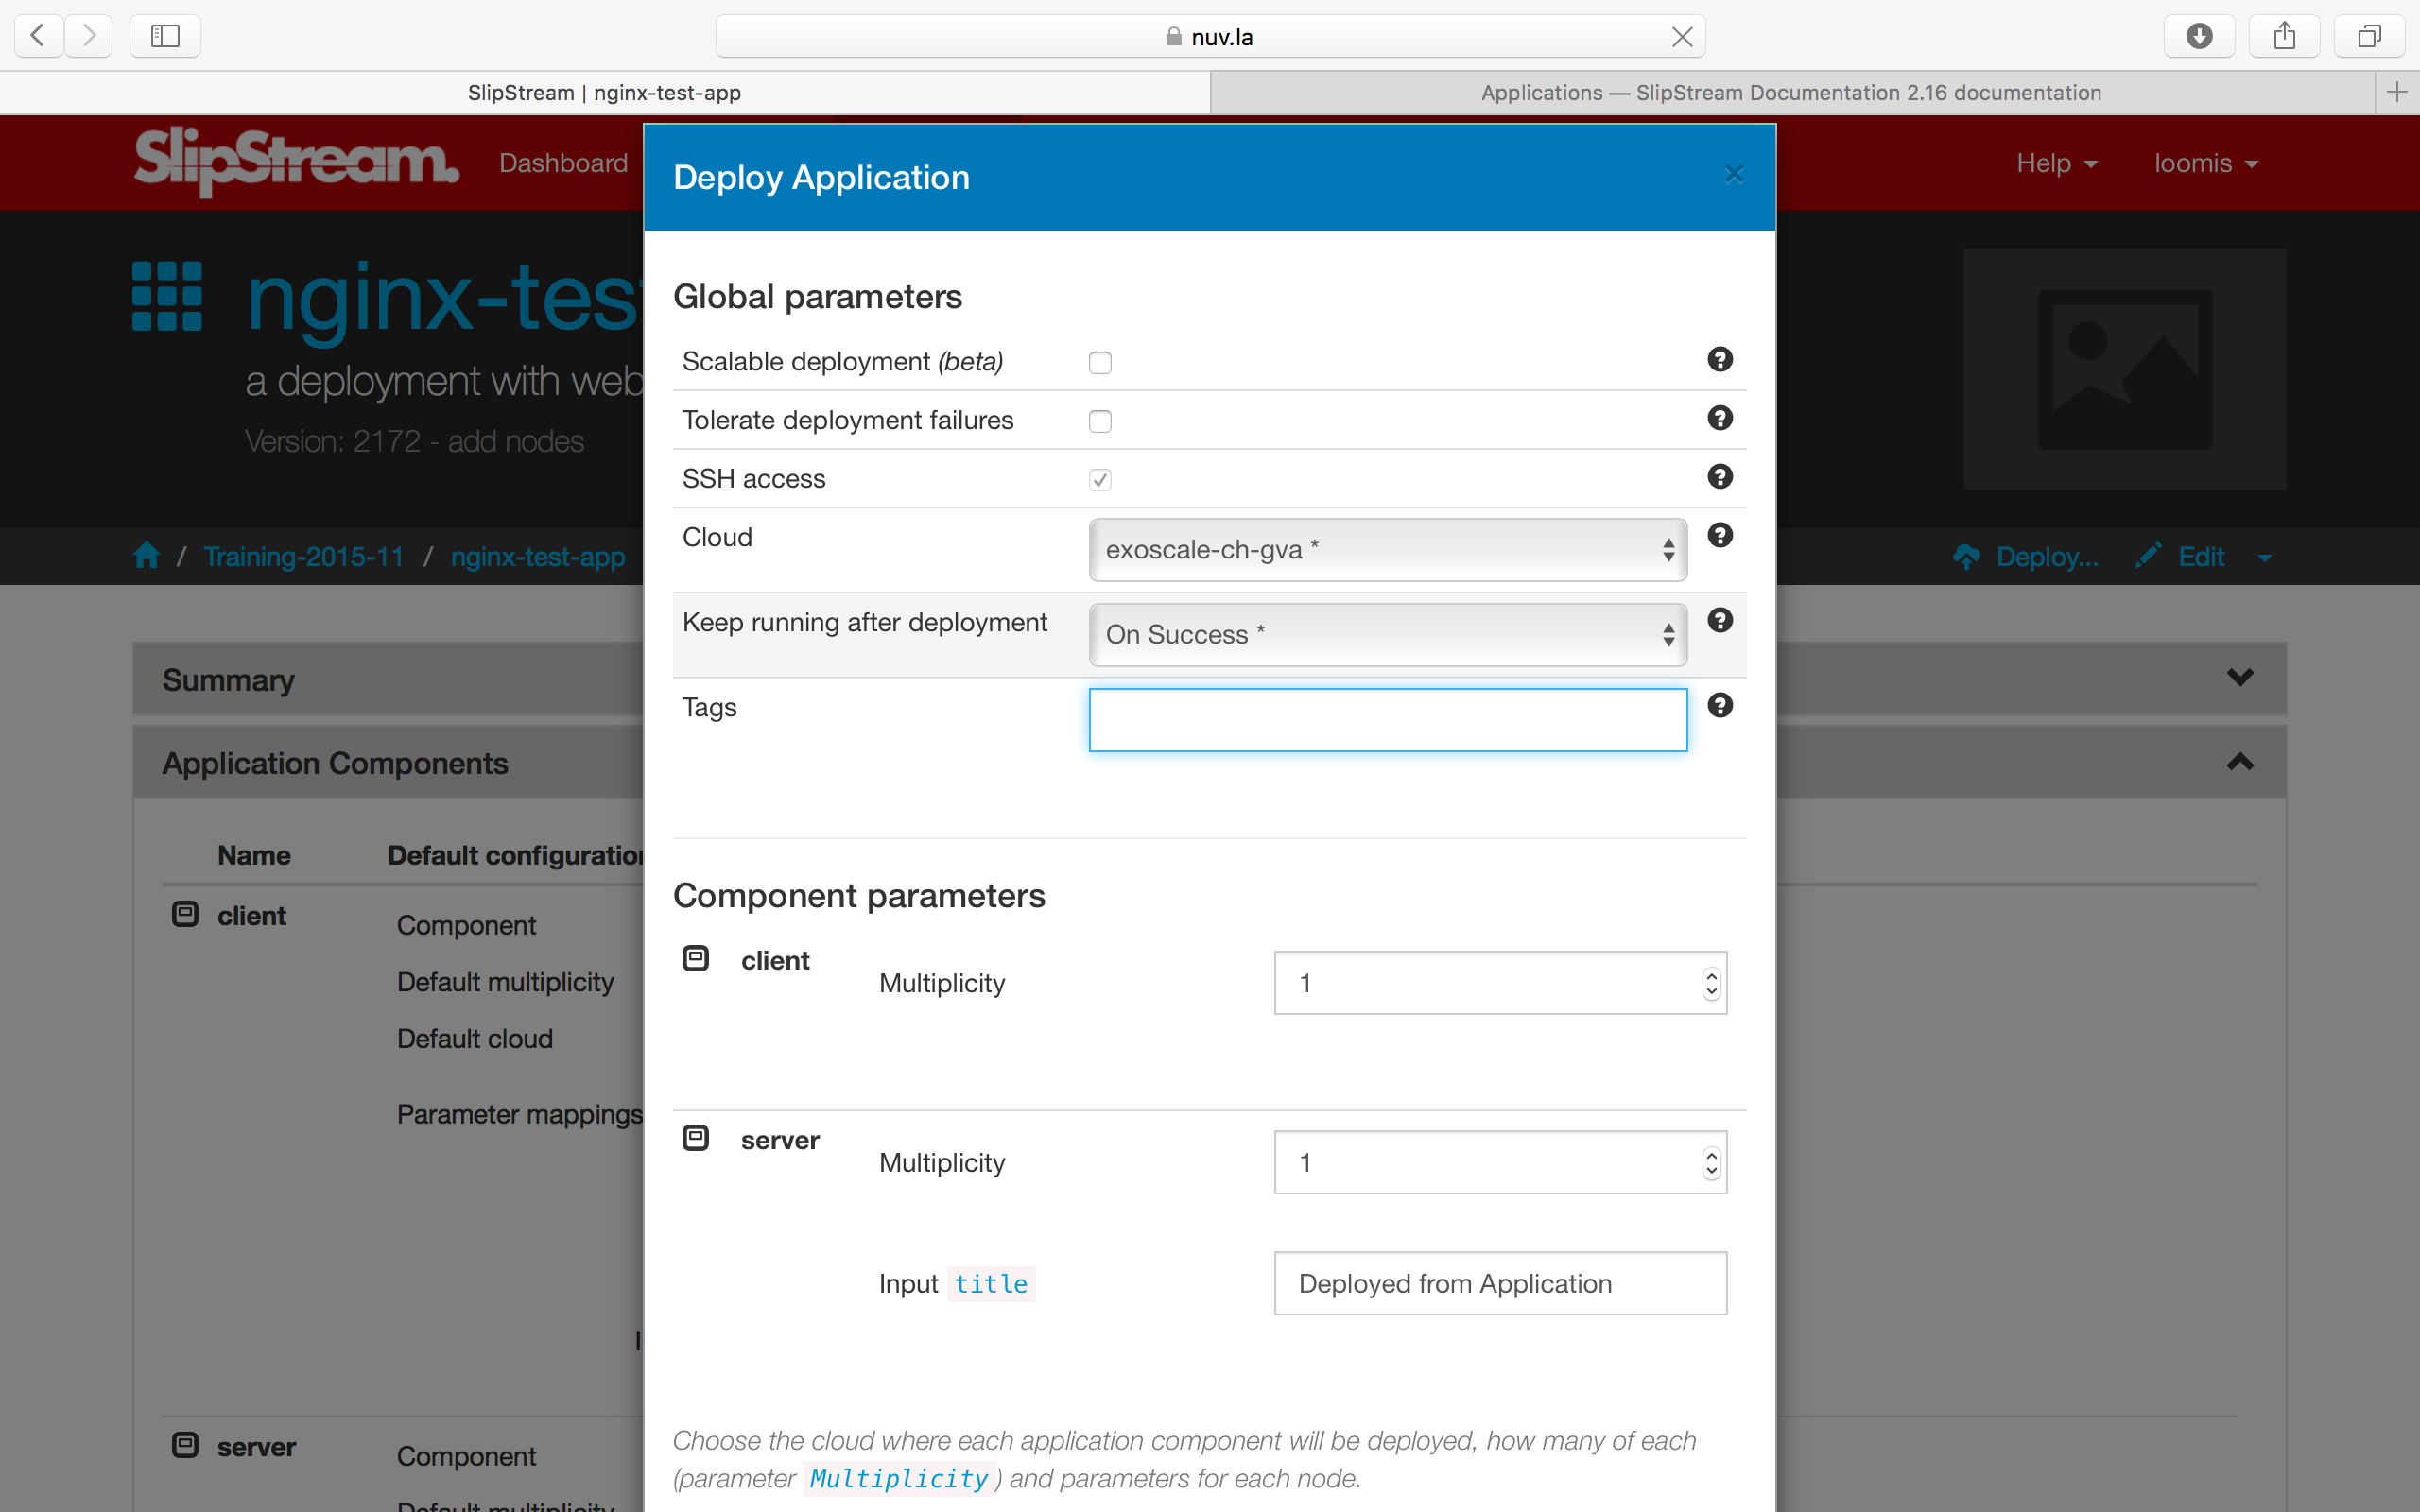
Verify that all of the input parameter values are OK and then run the application. As usual you will be redirected to the dashboard. You can view the advancement of the application from there or from the run page.
When the application completes the deployment, review the reports to ensure that everything worked correctly.
Advanced Deployments
From the run dialog you can make a number of significant changes to the application deployment without having to change the application definition itself.
Changing Multiplicity
You can change the multiplicity of the nodes in a particular deployment. The default is to have one web server and one test client. It doesn’t make much sense for this application to have more than one server, but having more than one client could be interesting.
You can do this by changing the client multiplicity in the run dialog.
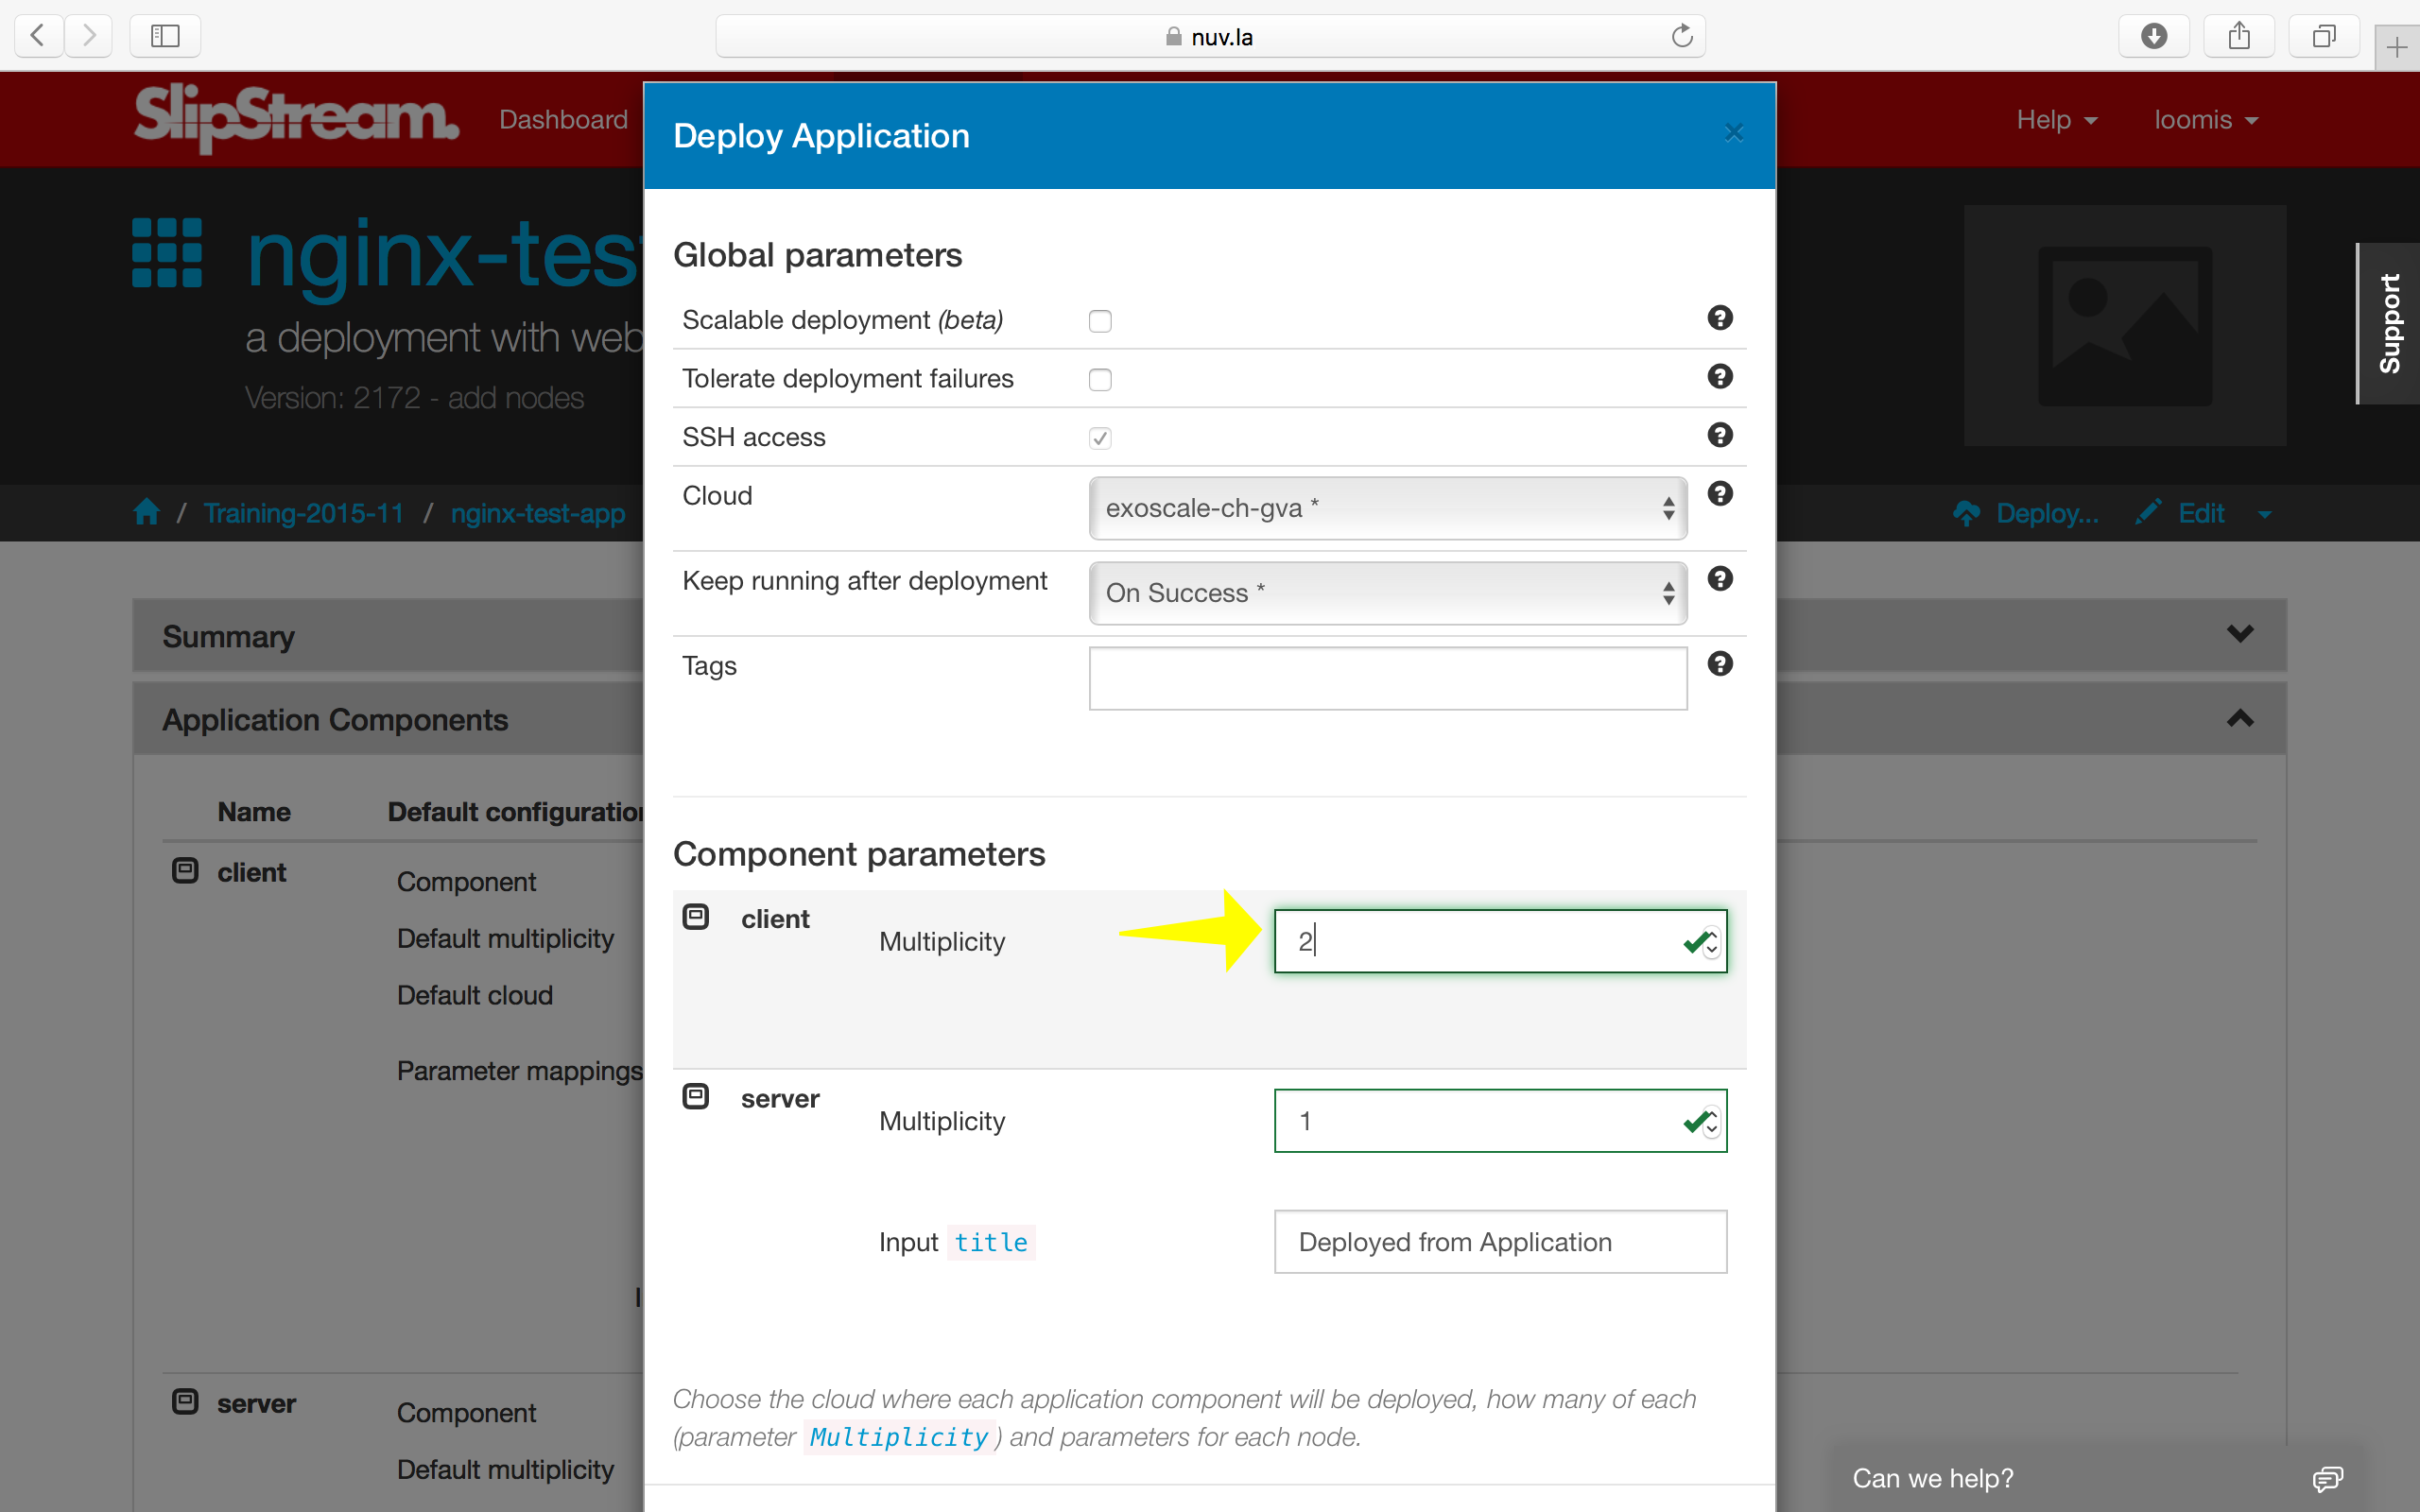
This will then deploy three machines in total. You can check that the reports for each of the clients shows successful results.
Multi-Cloud Deployments
You can also deploy the nodes of the application into different clouds or different cloud regions of the same cloud, creating a real multi-cloud deployment.
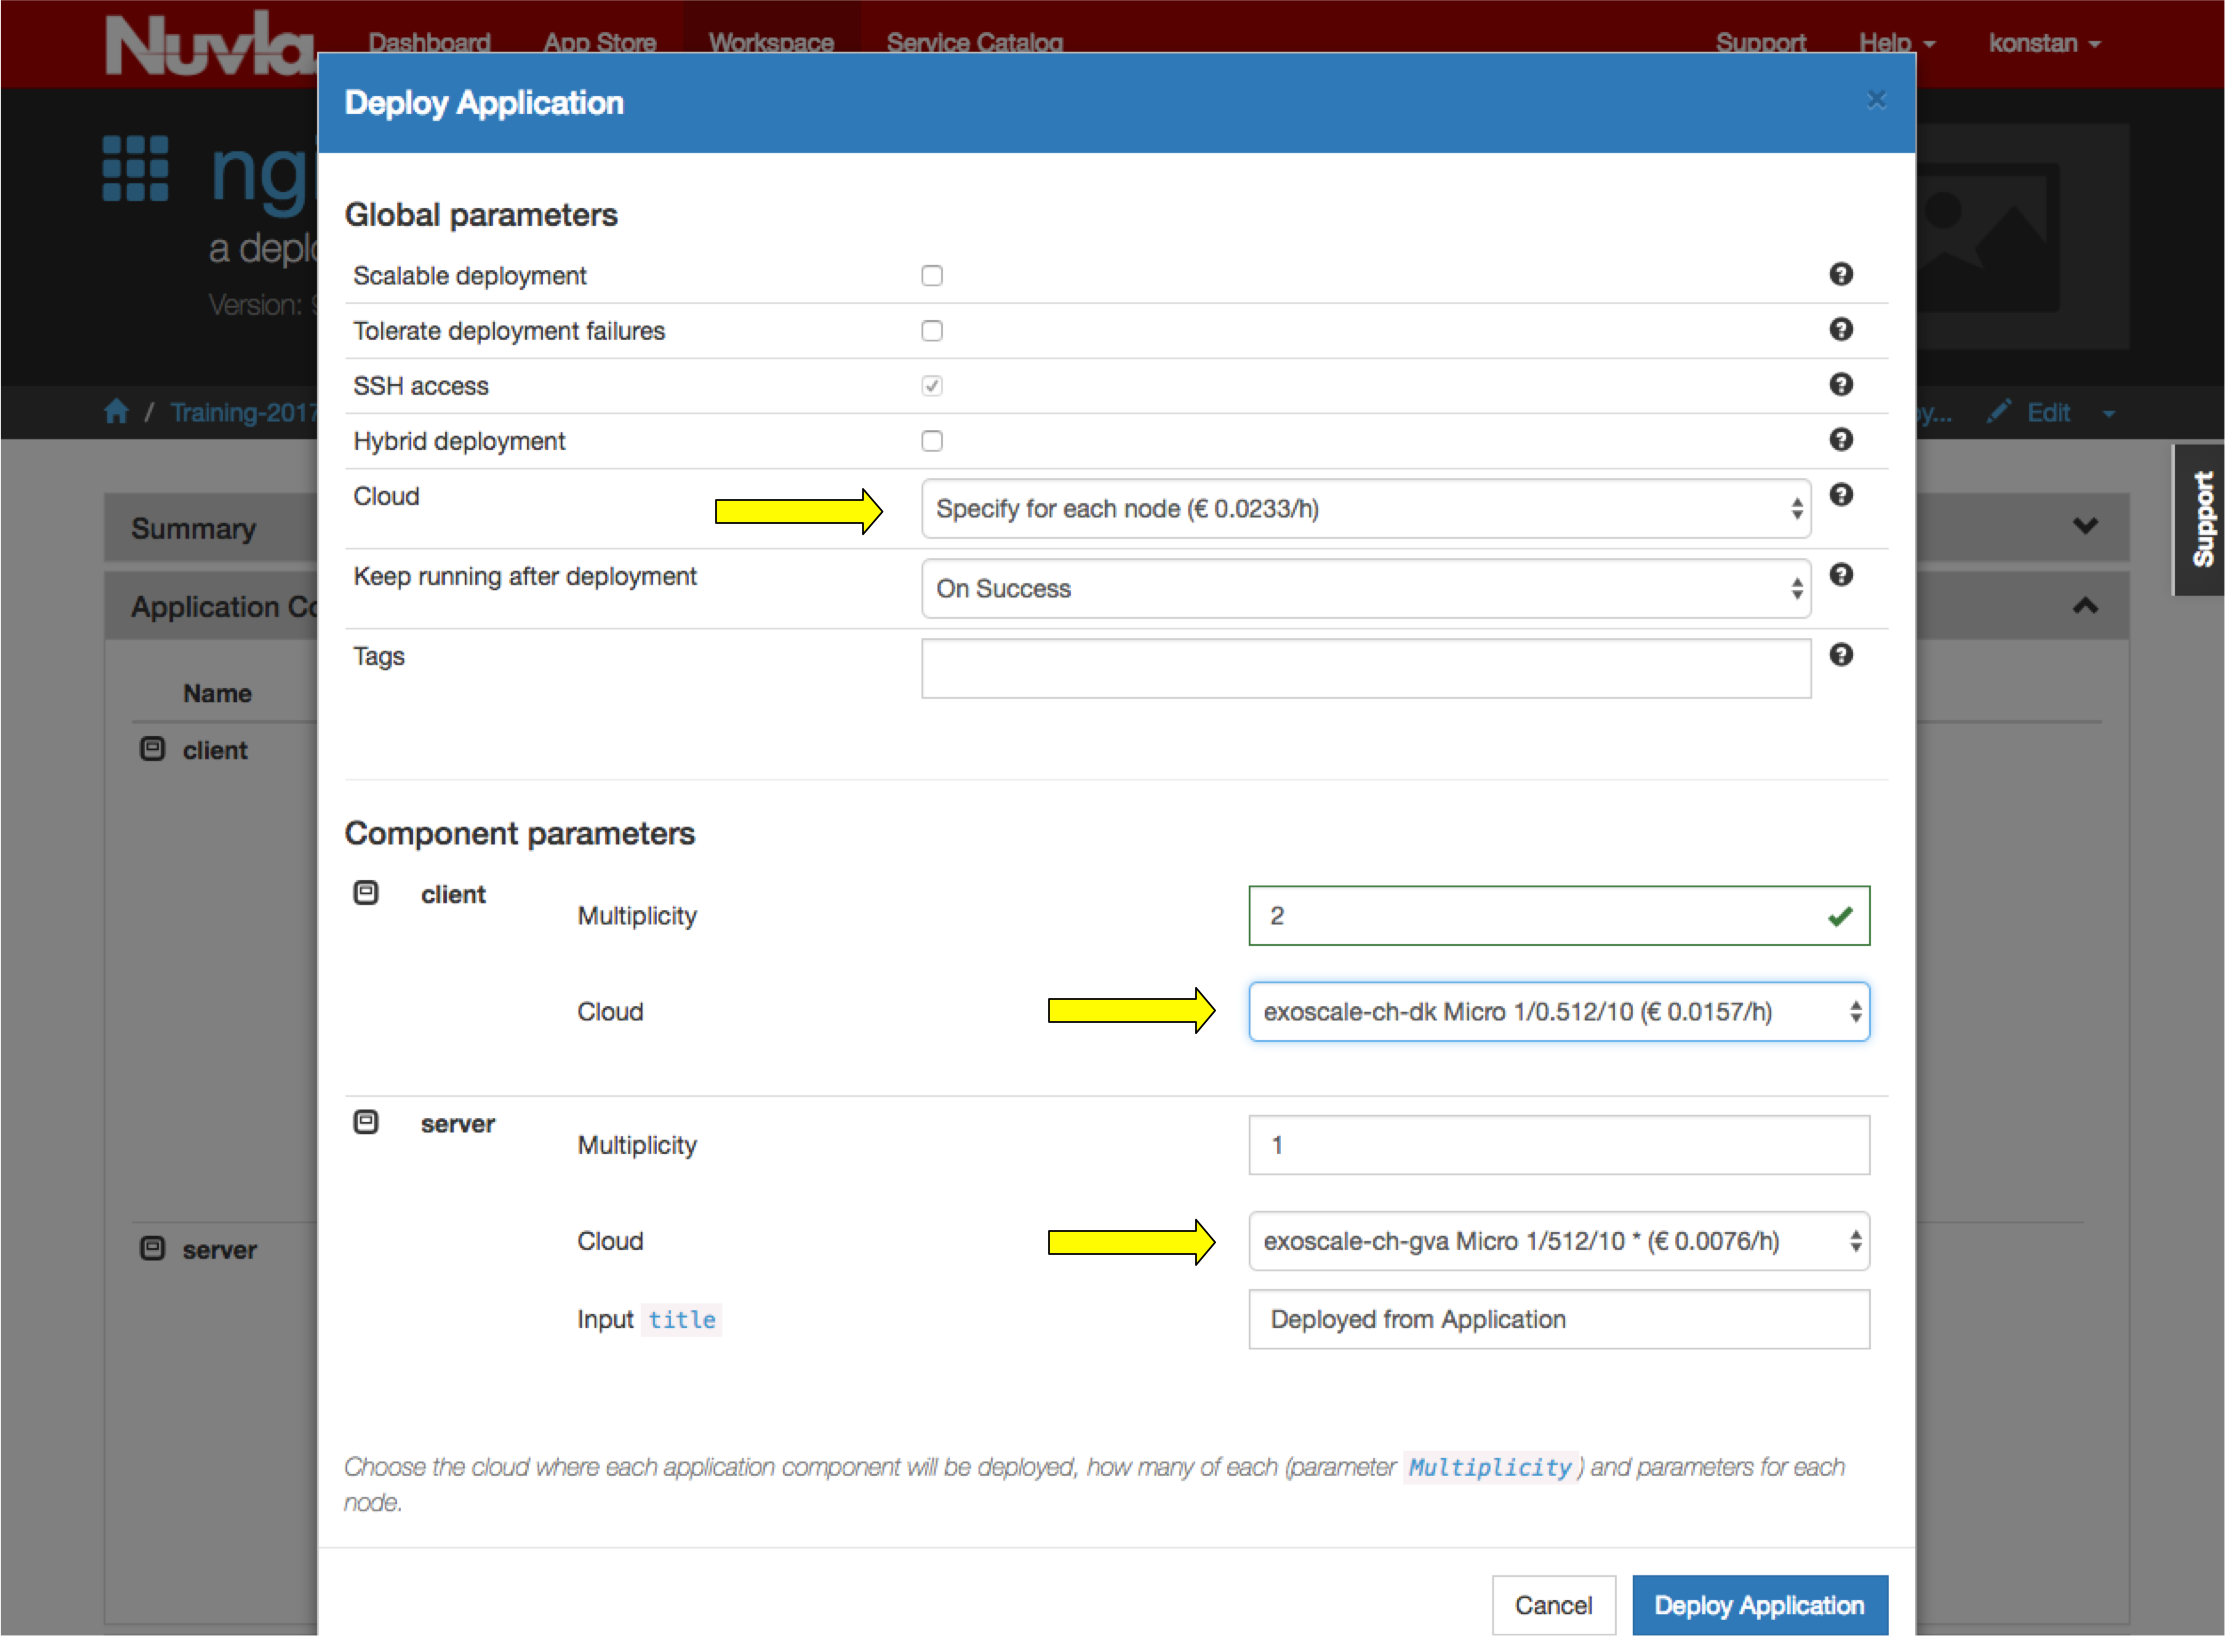
To do this, choose the option to set the cloud for each node separately. Then do so for each node type. In the above screenshot, I’m running the server on Exoscale in exoscale-ch-gva and exoscale-ch-dk regions.
Orchestrators
You may have noticed that during the deployment of an application, an additional machine is deployed per cloud. This machine is called the orchestrator and is created and deployed by SlipStream to handle the deployment of multi-machine applications.
The orchestrators remain active only when the application can go through a “provisioning” stage. For the types of deployments that we’ve done up to this point, the orchestrators will be terminated after all of the reports have been sent back to the SlipStream server.
Although very lightweight, the orchestrator does represent a small overhead when deploying applications through SlipStream.
EXERCISES
- Deploy your application and verify from the reports that everything worked correctly.
- Change the number of clients and then verify from the reports that all of the clients had the correct responses from the server.
- Deploy the client node and server nodes in different clouds and verify that the deployment works.
- Can you modify the application so that you can put clients in different clouds? Verify that your solution works.