Scalable Applications
Very few, if any, applications experience a constant load. Most experience large fluctuations that require adjustments to maintain responsiveness at peak demand and to avoid wasting resources when demand declines.
In this section you will learn how to:
- Deploy an application that can be scaled horizontally and vertically
- Scale the application through the API
- Respond to resource changes to update configurations
Types of Scaling
By default, the resource allocation of a deployment is fixed when the deployment is started. However clicking on the “Scalable deployment” option in run dialog will allow the deployment to be vertically and horizontally scaled through the SlipStream API. The following scaling actions are possible:
- Horizontal Scaling
- add VM (scale up)
- remove VM (scale down)
- Vertical Scaling
- change VM in size (CPU/RAM or instance type)
- attach/detach extra disk to/from VM
When a run of a deployment is declared as scalable, the orchestrator VM will not be terminated when the initial deployment finishes. This necessary overhead allows the SlipStream to respond to requests to scale the deployment.
Triggering Scaling Actions
For a running application, the scaling actions can be triggered through the SlipStream REST API or through the command line client. Scaling actions are not yet supported in the web interface.
The API calls to trigger the scaling actions are available under the Run section of the SlipStream API documentation.
The SlipStream CLI comes with the following commands that trigger the scaling actions on deployments and VMs:
ss-node-add [options] <run> <node-name> [<number>]
ss-node-remove [options] <run> <node-name> <ids> [<ids> ...]
ss-scale-resize [options] [--cpu <num>, --ram <num>]|[--instance-type <type>] <run> <node-name> <ids> [<ids> ...]
ss-scale-disk [options] [--attach <GB> | --detach <device>] <run> <node-name> <ids> [<ids> ...]
Where node-name stands for application component name.
Scalability Workflow Hooks (Scripts)
Hooks that define application-specific scaling actions are available for running before, after and during the respective scalability actions. These scripts are required so that the application components can be correctly reconfigured when scaling actions happen.
The available hooks are defined in the following table.
| Script | Action | When and Where Executed |
|---|---|---|
| “On VM Add” | horizontal scale up | after addition of new VMs on all the VMs of the
deployment except the ones that were just added.
|
| “On VM Remove” | horizontal scale down | after the removal of the requested VMs on all
the VMs left in the deployment.
|
| “Pre-Scale” | horizontal scale down | before VMs removal action, on the VMs targeted
for the removal, and therefore, before the
“On VM Remove” script.
|
| “Pre-Scale” | vertical scale up/down | before any vertical scaling action (VM resizing
or attaching/detaching of extra disk) on the
VMs that are subject to the scaling action.
|
| “Post-Scale” | vertical scale up/down | after any vertical scaling action (VM resizing
or attaching/detaching of extra disk) on the
VMs that are subject to the scaling action.
|
Detailed information about how to write those scripts is available from the SixSq GitHub repository.
Horizontal Scaling - Add or Remove VMs
When adding a component instance (VM), you must specify the component type of the machine that you want to add. The server (and then orchestrator) will mutate the deployment, provisioning the new node instance and then notifying all of the machines in the application.
The notification takes place by running the “On VM Add” script (if it exists) on all VMs, except the ones that were just added. On the newly added VMs only the deployment target script is executed.
As an example, look at the Elasticsearch cluster application. Because Elasticsearch has its own discovery service and was designed for horizontal scaling it doesn’t need elaborate hook scripts in the SlipStream configuration.
In the “Deployment” script, we can allow Elasticsearch to discover other members of the cluster by listing its peers in the configuration. The code to do this is the following:
# application or application component?
run_type=`ss-get ss:category`

if [ "${run_type}" = "Image" ]; then
  hosts=`ss-get hostname`
else
  # discover all of the workers
  nodename=`ss-get nodename`
  workers=$(echo `ss-get ${nodename}:ids` | tr ',' "\n")

  # create list of their hostnames for discovery
  hosts=""
  for w in $workers; do
    h=`ss-get ${nodename}.${w}:hostname`
    hosts="${hosts} \"${h}\""
  done
fi

hosts=$(echo ${hosts} | tr ' ' ',')

# rewrite the elasticsearch configuration file
# this will allow all hosts to discover each other
cat > /etc/elasticsearch/elasticsearch.yml <<EOF
network.host: 0.0.0.0
discovery.zen.ping.unicast.hosts: [${hosts}]
EOF
The interesting part for this tutorial is how the list of Elasticsearch workers is built up.
We initially detect whether the deployment was an application (“Deployment”) or an application component (“Image”) because the parameters are slightly different in the two cases. By doing this test, the resulting component can be run as a standalone image or as part of an application.
For an application, where more than one worker is possible, we use the
nodename and ids to iterate over all of the workers and
collect their hostnames. After all of the values have been
substituted, the variable names for the hosts of the workers look like
“worker.1:hostname”, “worker.2:hostname”, etc.
Note that we only need to do this in the deployment script because Elasticsearch keeps track of the cluster state and transmits this information to all of the nodes in the cluster itself. If it didn’t do this, we would need to tell each node of the changes through the “on VM add” script.
After the configuration of the service, we restart Elasticsearch to take into account the configuration changes. Look in the application and component definition for details.
To see how the scaling works, deploy the elasticsearch-cluster application.

To be able to scale the application later, it is very important to tick the checkbox indicating that this is a scalable deployment! By default, this will deploy a cluster with two nodes.
When the deployment is complete, it will provide a URL that gives the health of the cluster. The important thing to look at is the number of nodes in the cluster. It should initially be 2. This is the result:
{
  "cluster_name" : "elasticsearch",
  "status" : "green",
  "timed_out" : false,
  "number_of_nodes" : 2,
  "number_of_data_nodes" : 2,
  "active_primary_shards" : 0,
  "active_shards" : 0,
  "relocating_shards" : 0,
  "initializing_shards" : 0,
  "unassigned_shards" : 0,
  "delayed_unassigned_shards" : 0,
  "number_of_pending_tasks" : 0,
  "number_of_in_flight_fetch" : 0,
  "task_max_waiting_in_queue_millis" : 0,
  "active_shards_percent_as_number" : 100.0
}
The deployment worked correctly: the status is green and there are 2 nodes.
Scale Up with CLI
To scale the run via the command line, use the ss-node-add command. It takes the run ID, the type of node to scale (“worker” in our case) and the number of nodes to add:
$ ss-node-add ced28f99-e08b-4667-86db-73f53c059c58 worker 1
This will drive the application through another provisioning phase for the new worker. When the provisioning and configuration is complete, the application will return to the “Ready” state.
Note
Only one scaling action, on one type of component, can be active. Previous scaling actions must complete before a new one can be started.
Scale Up with REST
To do the same thing from the REST API, send a POST request to the URL:
https://nuv.la/run/ced28f99-e08b-4667-86db-73f53c059c58/worker
the body of the request should be a form with the parameter “n” and the number of nodes to add.
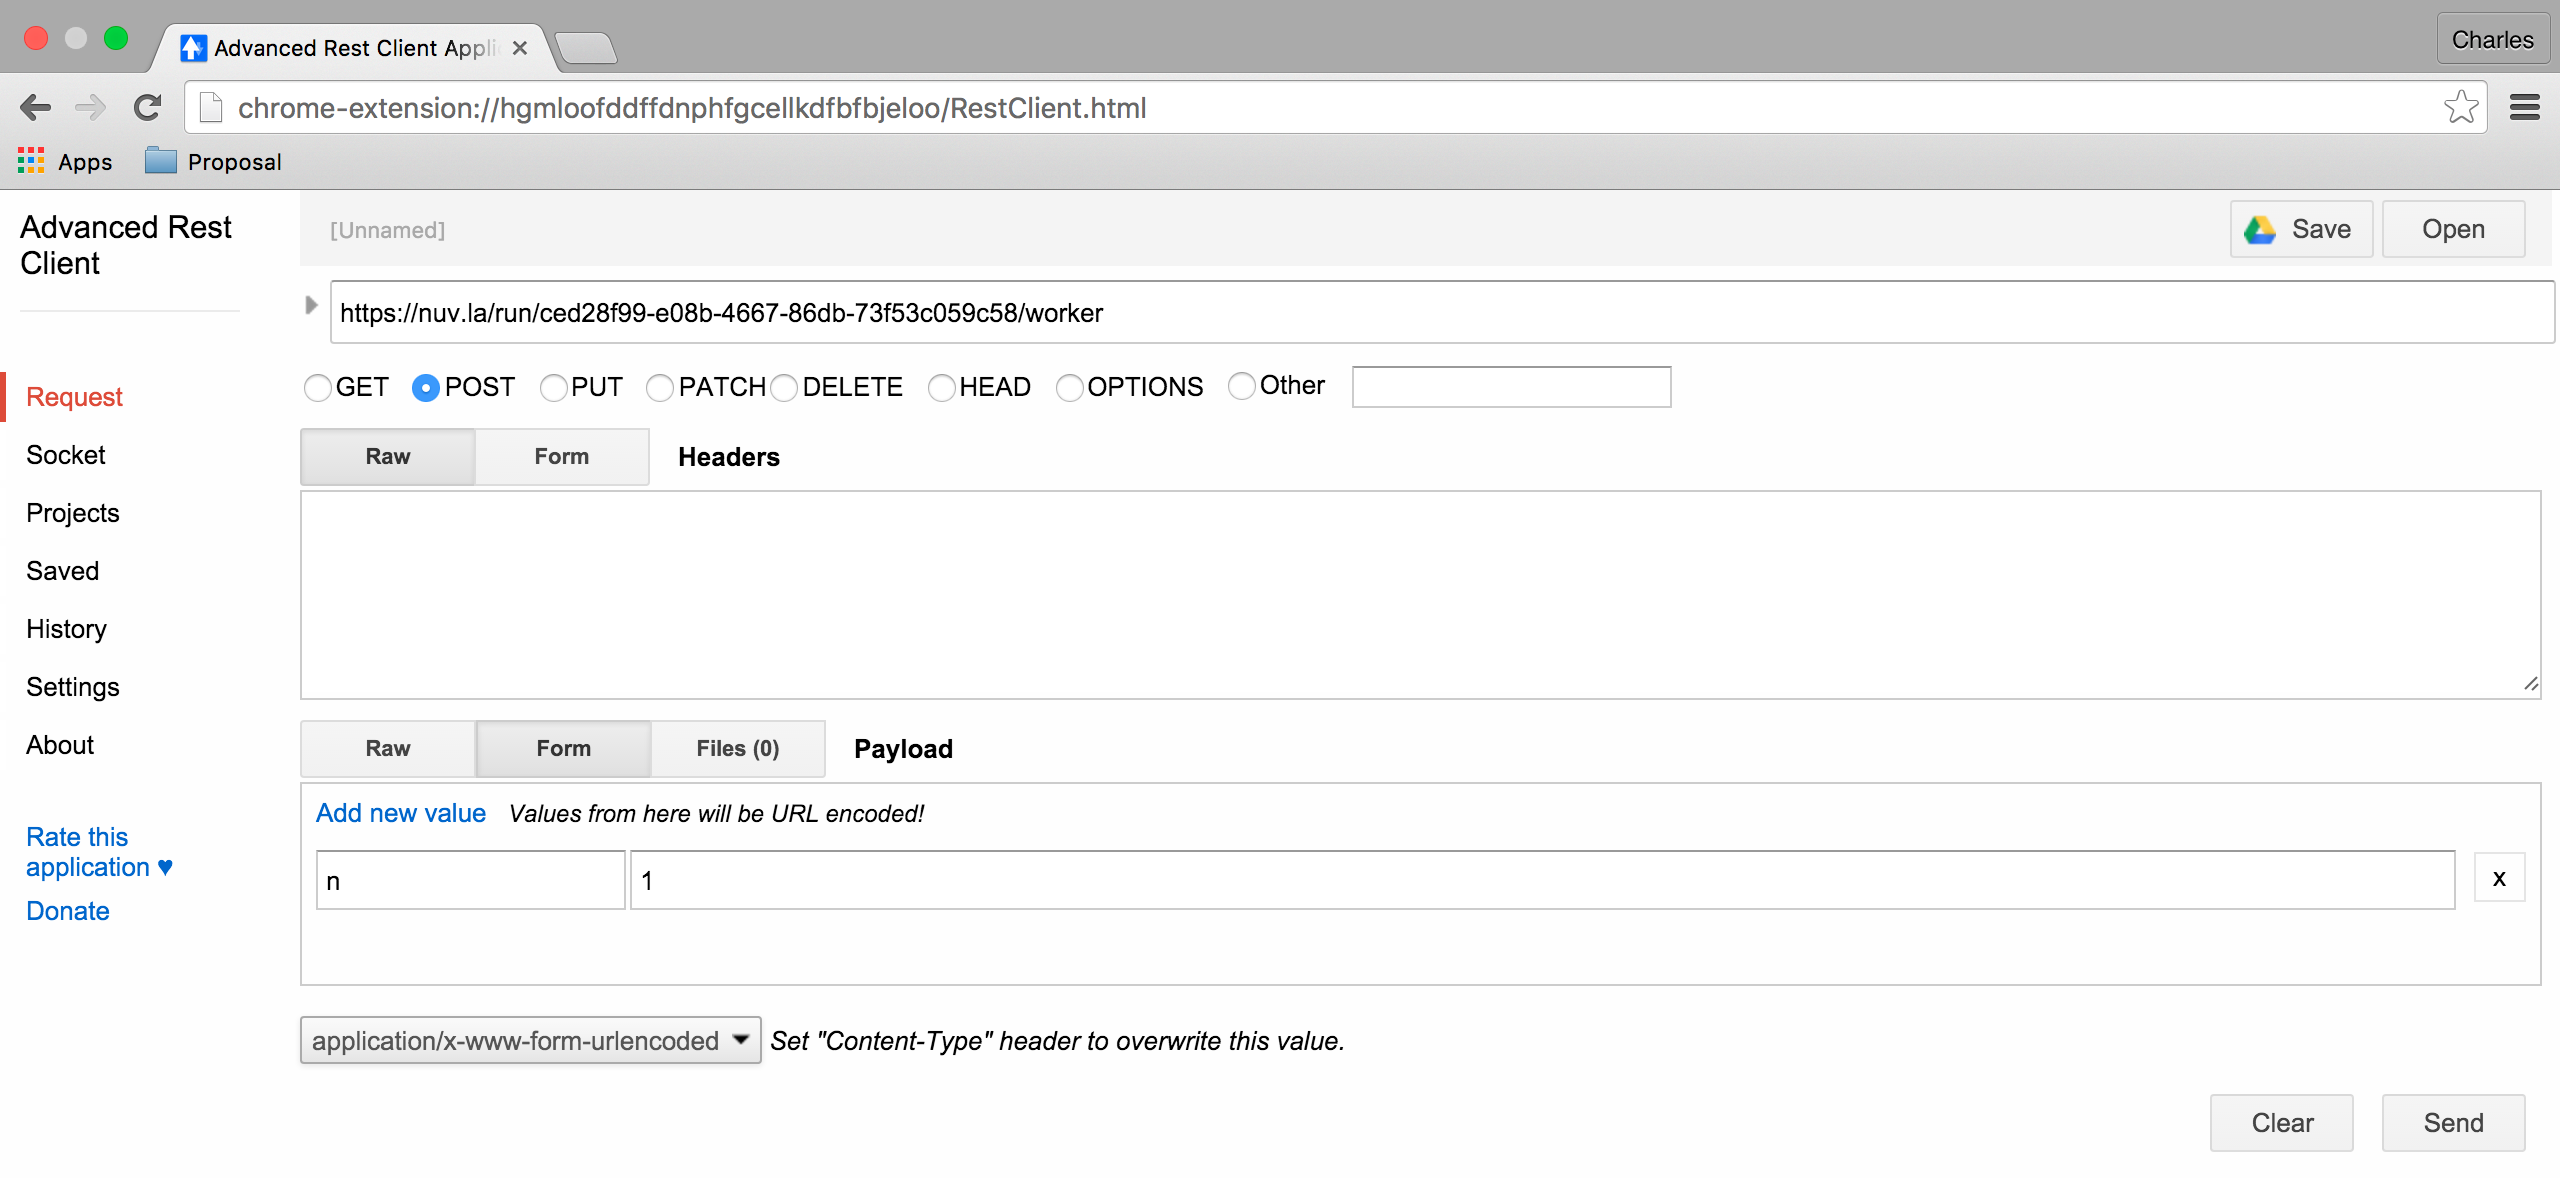
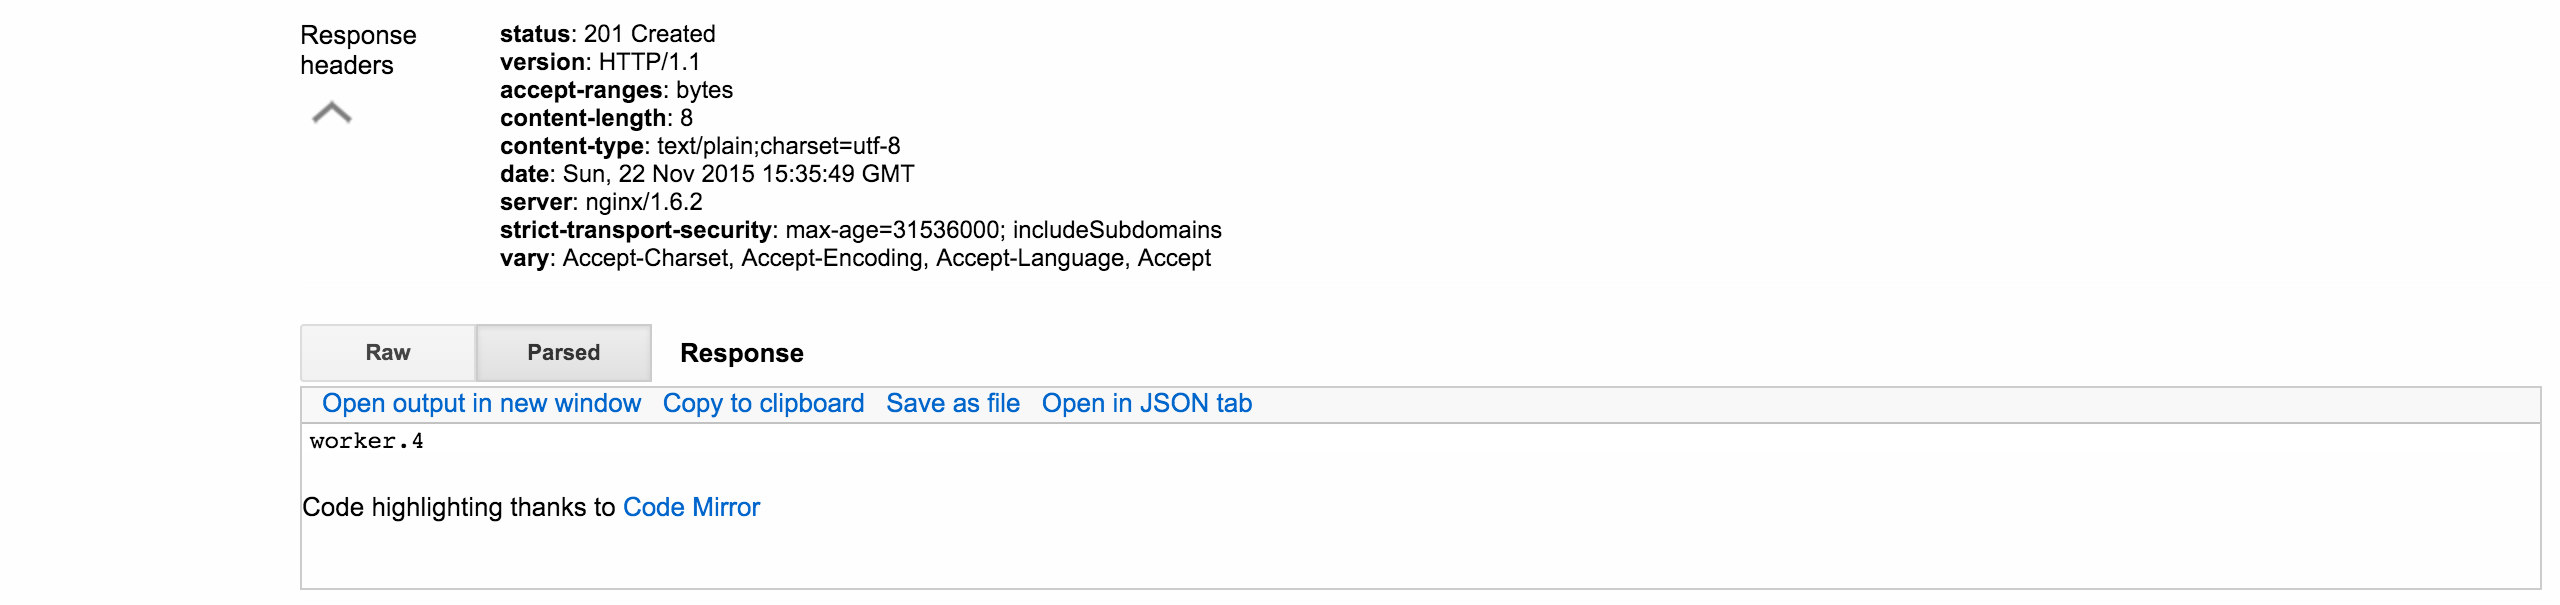
Note that the response gives the created node(s).
Just to verify that both of the add requests worked, look again at the health output from the service URL:
{
  "cluster_name" : "elasticsearch",
  "status" : "green",
  "timed_out" : false,
  "number_of_nodes" : 4,
  "number_of_data_nodes" : 4,
  "active_primary_shards" : 0,
  "active_shards" : 0,
  "relocating_shards" : 0,
  "initializing_shards" : 0,
  "unassigned_shards" : 0,
  "delayed_unassigned_shards" : 0,
  "number_of_pending_tasks" : 0,
  "number_of_in_flight_fetch" : 0,
  "task_max_waiting_in_queue_millis" : 0,
  "active_shards_percent_as_number" : 100.0
}
A heathy green with 4 nodes! Perfect.
Scale Down with CLI
We can also remove nodes in nearly the same way. The only difference is that you must specify exactly which node(s) you want to remove. From the command line, do the following:
$ ss-node-remove ced28f99-e08b-4667-86db-73f53c059c58 worker 1
Again, after the (un-)provisioning cycle, the removed node instances will disappear from the deployment.
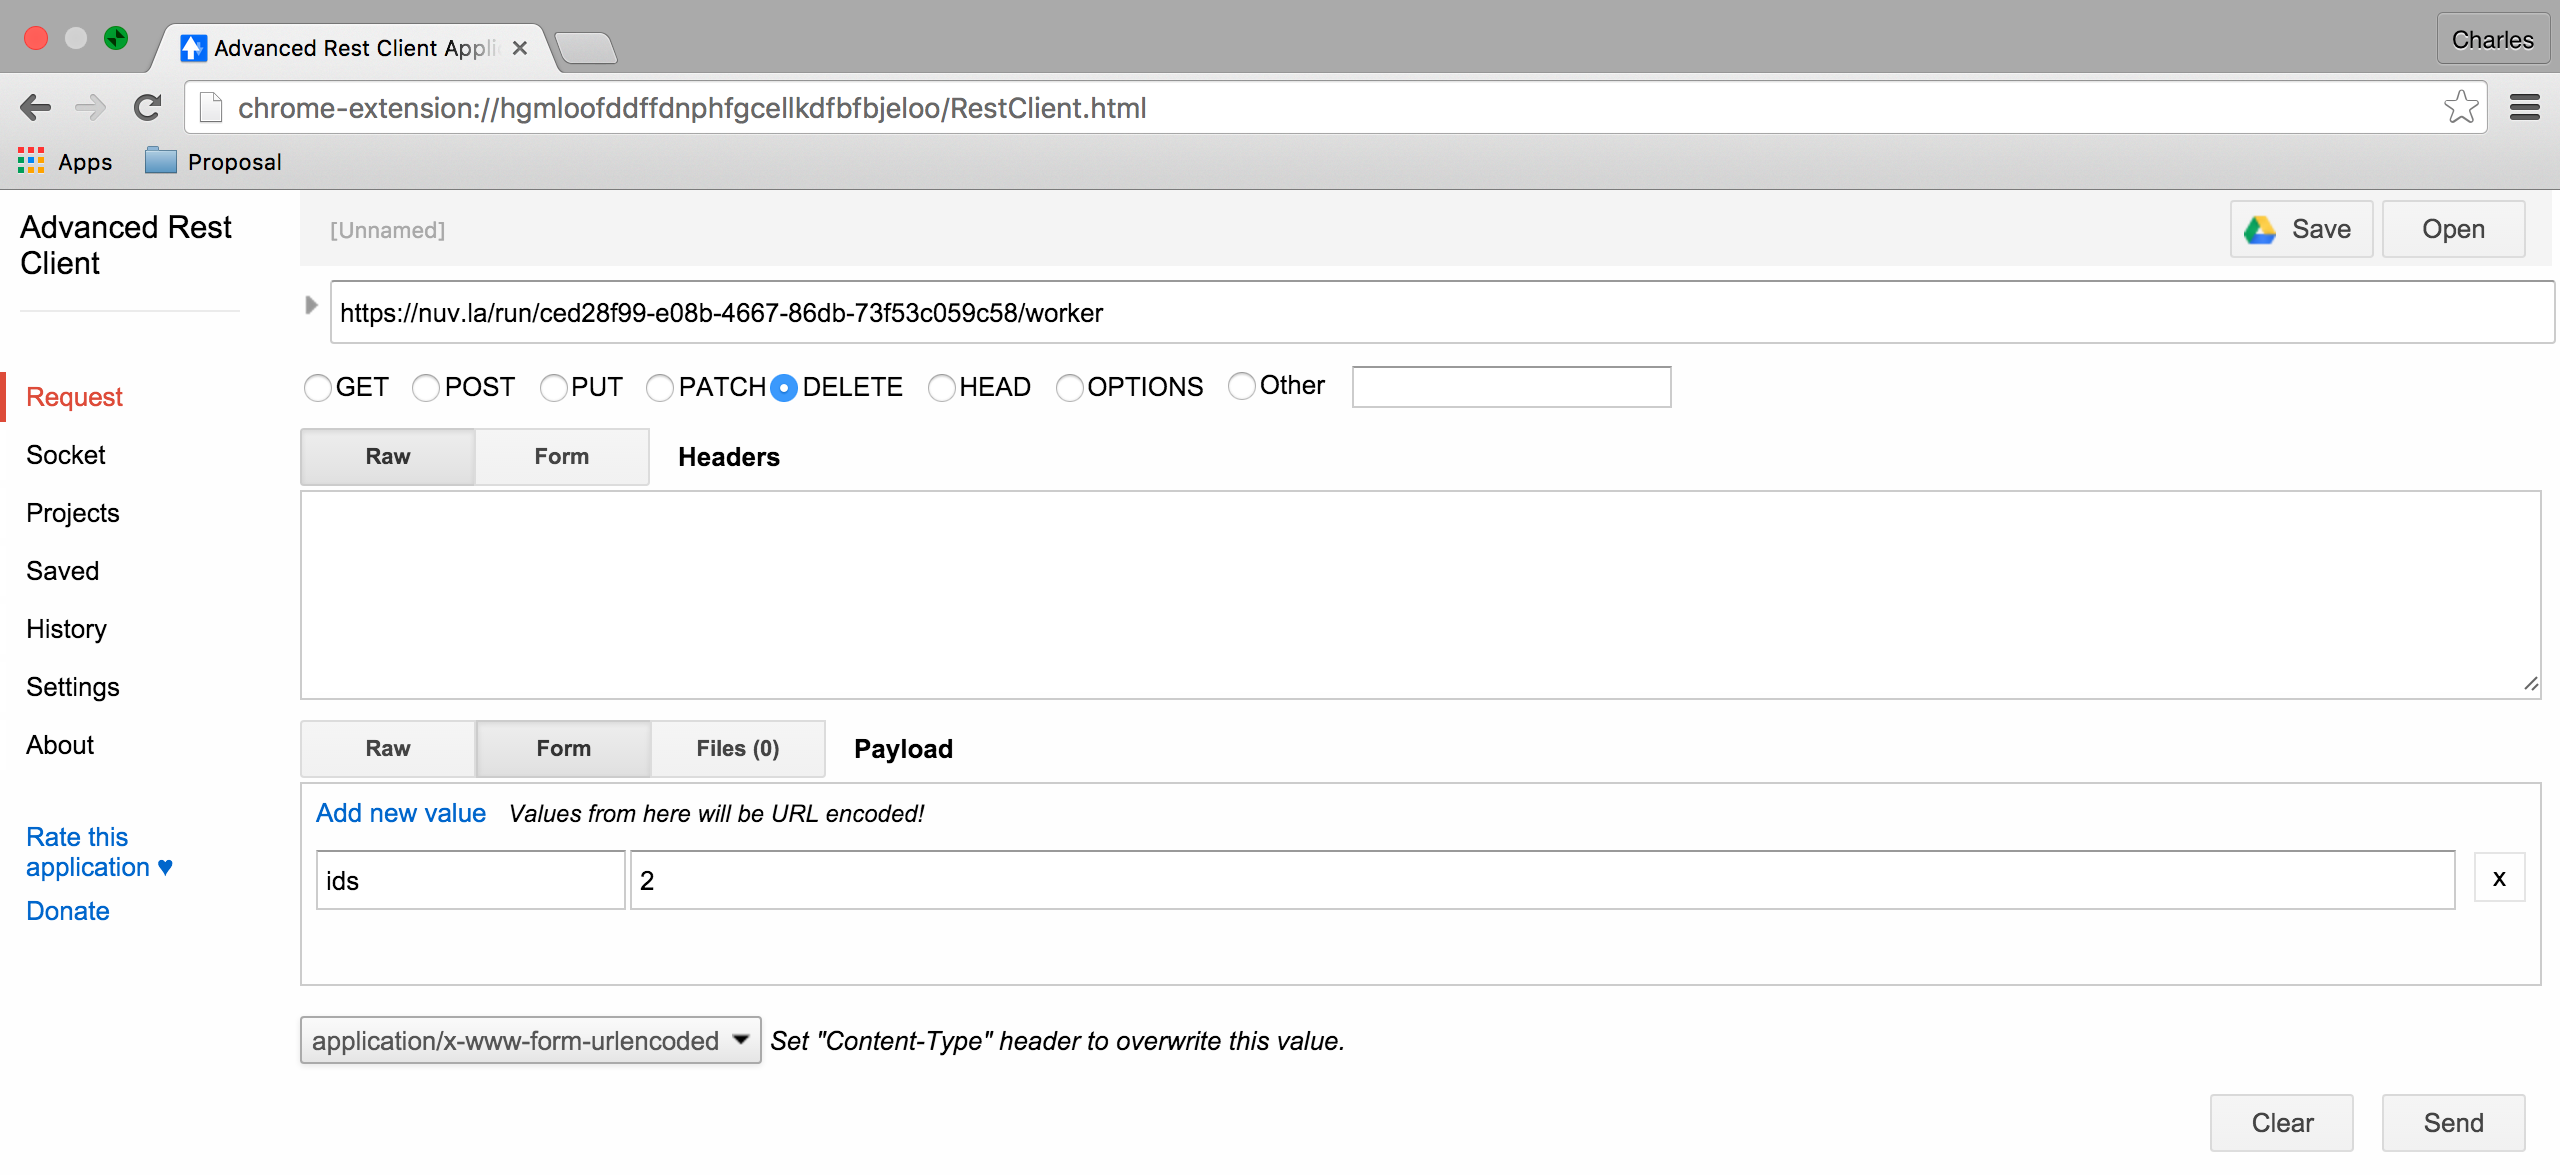
Scale Down with REST
Doing the same with the REST API, requires sending a DELETE request to the URL:
https://nuv.la/run/ced28f99-e08b-4667-86db-73f53c059c58/worker
with a form body containing the “ids” parameter. The values of “ids” must be a comma-separated list of machines to remove.

After these actions, check the health and make sure it is green with 2 nodes:
{
  "cluster_name" : "elasticsearch",
  "status" : "green",
  "timed_out" : false,
  "number_of_nodes" : 2,
  "number_of_data_nodes" : 2,
  "active_primary_shards" : 0,
  "active_shards" : 0,
  "relocating_shards" : 0,
  "initializing_shards" : 0,
  "unassigned_shards" : 0,
  "delayed_unassigned_shards" : 0,
  "number_of_pending_tasks" : 0,
  "number_of_in_flight_fetch" : 0,
  "task_max_waiting_in_queue_millis" : 0,
  "active_shards_percent_as_number" : 100.0
}
Everything looks to have worked correctly!
Scale Down Scripts
Before the removal of the node instances, the “Pre-scale” script gets run on them. This allows to execute any application related pre-removal actions on the targeted node instance.
Similarly, the “On VM Remove” script will be run on each node instance after the given node instance(s) have been removed.
None of these scripts is necessary for the Elasticsearch cluster itself. However, we want to maintain a working service URL for the deployment as a whole. If the node referenced in the service URL disappears, we want to update the service URL to a working node:
#!/bin/bash -xe

# application or application component?
run_type=`ss-get ss:category`

if [ "${run_type}" = "Image" ]; then
  # should never be called from a component deployment anyway
  exit 0
else

  # only run if my own node type is being scaled
  nodename=`ss-get nodename`
  if [ "${SLIPSTREAM_SCALING_NODE}" = "${nodename}" ]; then

    # collect all of the remaining workers
    workers=$(echo `ss-get ${nodename}:ids` | tr ',' "\n")

    echo "WORKERS: ${workers}"
    echo "REMOVED: ${SLIPSTREAM_SCALING_VMS}"

    # update URL with first remaining host
    for w in $workers; do
      hostname=`ss-get ${nodename}.${w}:hostname`
      link="http://${hostname}:9200/"
      health="${link}_cluster/health?pretty=true"
      ss-set ss:url.service ${health}
      exit 0
    done
  fi
fi
This script just resets the URL using the hostname associated with the first one in the cluster.
Vertical Scaling
Important
Vertical scalability is not available for all clouds. It requires the availability of the feature in the underlying cloud as well as in the SlipStream cloud connector.
Change the VM Size
An application manager may discover that a running application would be more efficient if certain virtual machines were allocated additional CPU, RAM, or disk space. To request the resizing of the VM from the command line, run the following command, providing the desired new size of the VM:
$ ss-scale-resize --cpu 8 --ram 16 \
    f9390d34-10b1-4621-bd05-f4d8c7557754 db 1 3
The size specification depends on the cloud being used. Only CPU or RAM can be specified.
The same way one can scale down the size of the VM(s) by simply defining the required size of the VM(s).
Note
Virtual machines that are vertically scaled, will go through a reboot cycle to force the new resource values to be taken into account.
Attach and Detach Disks
To add an extra disk, the following command should be used:
$ ss-scale-disk --attach 75 \
    f9390d34-10b1-4621-bd05-f4d8c7557754 db 1 3
The extra disk is attached as a block device and on Linux systems should
appear as block device under the /dev folder usually as /dev/sd*
or /dev/vd*. The block device name depends on the virtualization
driver used and this should be checked with the cloud provider.
Detaching an extra disk requires either the block device name (e.g.,
/dev/vdc) or its cloud ID (usually in the form of a UUID). Here is the
example of detaching of the extra disk by the block device name:
$ ss-scale-disk --detach /dev/vbc \
    f9390d34-10b1-4621-bd05-f4d8c7557754 db 1 3
In all the above cases the “Pre-Scale” and “Post-Scale” scripts will be run respectively right before and after the IaaS scaling action is requested from the Cloud by the orchestrator. On most of the clouds the resizing of VMs requires their reboot. The scripts allow the user to do the needful to prepare for the scaling action and later to account for the changes made to the VM.
The examples of the “Pre-Scale” and “Post-Scale” can be found here.
EXERCISES
- Deploy an Elasticsearch cluster.
- Add nodes through the command line or REST API.
- Remove nodes through the command line or REST API.