Faster Deployments
The software installation and much of the configuration for a component are static. Repeating this for every deployment increases the startup latency for the component and for the application as a whole.
“Building” an image, creates a new native image within a cloud infrastructure that already includes the static initialization, reducing the deployment latency.
This should only be considered as an optimization after the deployment is debugged and working because:
- Building an image can take a significant amount of time (20+ minutes)
- Not all clouds support user-generated images
- Some clouds require additional configuration to share the generated images with others
- Securing persistent images and ensuring they work can be difficult.
Nonetheless, the additional effort can significantly speed the deployment for frequently deployed applications, improving the customer’s experience and reducing their costs.
Worth the Effort?
Before deciding whether to build an image, measure the latencies in your actual application deployment. For each deployed application you can see the times at which the application entered each state. The time spent in the “executing” state is the maximum amount of time by which you can reduce the startup times.
Also determine whether the clouds that you target support user-defined images. If you will need to support cloud infrastructures that both support and do not support user-defined images, then you will need to be especially careful to ensure that the component behaves identically on both infrastructures.
Understanding Workflows
Presumably if you’re still reading, then you’ve decided that building images is interesting for your application. You’ll need to understand how the standard application workflow differs from the build workflow. The following diagram shows which scripts are run for the standard deployment workflow, for the build workflow, and for the optimized workflow with a built image.
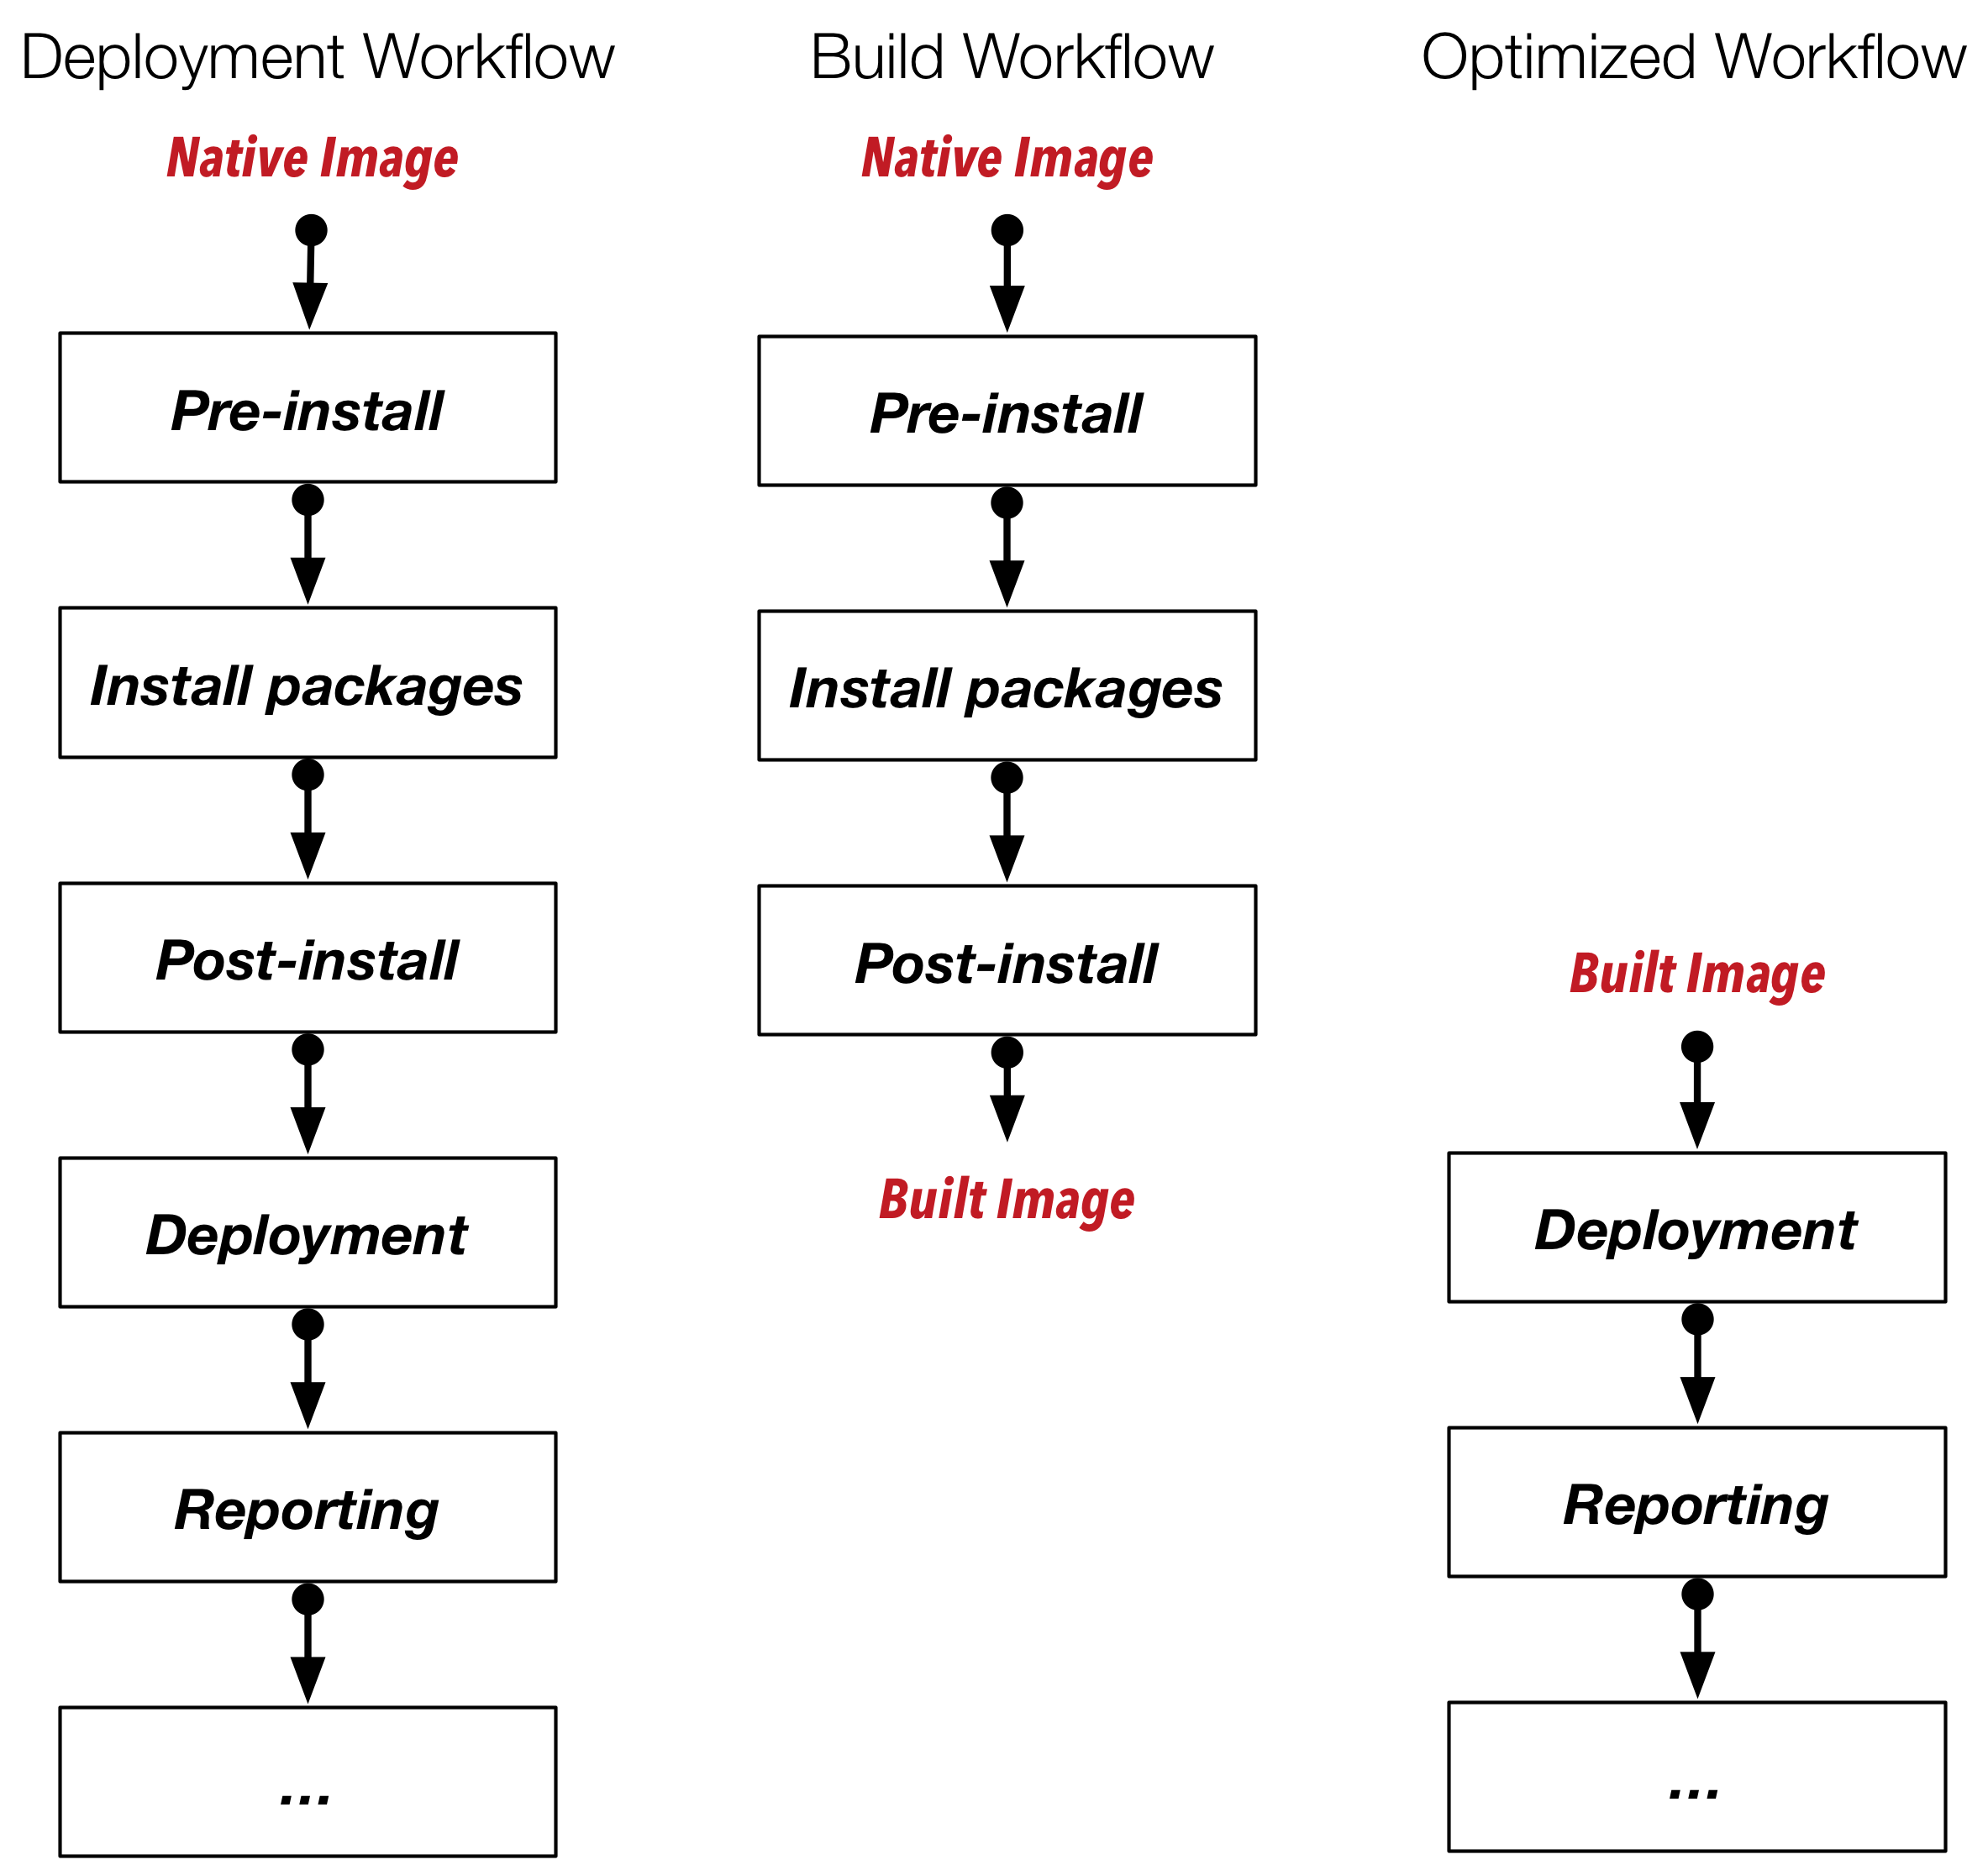
As you can see from the diagram, the “Pre-install”, “Install packages”, and “Post-install” are not run in the optimized workflow because those actions were already completed in the build workflow and saved in the created image. The work done in those phases represents the speed up you can achieve by building an image.
Building an Image
If you’ve followed the advice about what type of actions to put into each recipe, then your component should be nearly ready to be built. The important distinction is to ensure that static installation and configuration is done in the “Post-install” recipe and before. All dynamic configuration should be put into the “Deployment” recipe.
However to ensure that the component works identically on all of the clouds, you should consider adding a few things to your component description:
- Operating systems tend to persist networking configuration. Make
sure all such files are removed from the system in the
“Post-install” recipe. This usually comes down to a command like:
rm -f /etc/udev/rules.d/*net*.rules. - Any command histories, temporary files, etc. will be saved in the generated image. If you’ve used or generated sensitive information, be sure to remove it from the virtual machine in the “Post-install” recipe.
- Upgrading a system often involves the installation of a new kernel. To ensure that the new kernel is used in both standard and optimized workflows, you may want to insert a reboot of the machine at the end of the “Post-install” recipe. SlipStream is tolerant of such reboots.
- Similarly for a built image, you may want to also upgrade the system at the beginning of the “Deployment” recipe to pick up any new packages since the image was created.
After these changes, building an image is just a matter of clicking on the “Build…” button for the component you want to create.

You can then follow the progress on the dashboard as with any other deployment. When completed, you will see an image identifier has been added to the component in the “Cloud Image Identifiers and Image Hierarchy” section.
When SlipStream encounters a component with such an image identifier it will always use the optimized workflow for that cloud.
Warning
SlipStream will invalidate the built image if any of “Pre-install”, “Install packages” or “Post-install” of the component are modified; you must rebuild the component after any change in any of those steps of the Application Workflow. Also, SlipStream will not delete the built image from the cloud. That must be done manually, if desired.