Automating SlipStream
Although the SlipStream web interface provides a great interface for humans, there are cases where programmatic access is more appropriate. These cases include the need for bulk operations, programmatic control for continuous integration systems, and in a few cases access to features that don’t yet appear in the web interface.
In this chapter, you’ll learn about programmatic access to SlipStream through the command line client and through the REST API. The text and exercises will concentrate on the management of components and applications.
The REST API is documented on the http://ssapi.sixsq.com website. It provides the full list of SlipStream resources. Although we strive for complete documentation, there may be some holes in the API docs. If you run into trouble, please contact support and we’ll give you a hand.
Setup
Command Line Client
The SlipStream client is installed by default on all machines started
through SlipStream. To install it on your local machine, it can be
installed with pip, the python installer.
You will need to have python (v2.6+, not v3.x) installed on the
machine as well as pip. See the Python and pip websites for
installation of these tools on your machine.
Once python and pip are available, just running the following
should work:
$ pip install slipstream-client
for a system-level installation. If you don’t have administrator access to your machine, you can also perform a user-level installation:
$ pip install --user slipstream-client
In this case, be sure to modify your PYTHONPATH and PATH
to include the directories used by the pip user-level
installation.
cURL
The REST API uses the standard HTTP protocol, so any HTTP library can be used to access the API. A ubiquitous tool for quick HTTP requests is cURL. This is available natively on most operating systems.
If it is not available and you want to use it, see the cURL website.
If you’re going to use the cURL command line extensively, you will probably want to define the following alias:
$ alias ss-curl="curl --cookie-jar ~/cookies -b ~/cookies -sS"
This avoids having to repeat the options that you’ll need for every command. The following text, will assume that this alias has been defined.
Advanced REST Client
The Advanced REST Client (ARC) extension to the Chrome web browser allows a more graphical method of sending HTTP requests and visualizing the responses. To be able to reuse authentication cookies with ARC, you will have to install ARC cookie exchange Chrome extention as well.
Consult the referenced web sites for installation of Chrome and the REST client along with its cookie exchange on your machine.
Authentication
Just like with the web interface, you must be authenticated to use most of the SlipStream features through the command line or the REST API. At the moment, SlipStream supports both basic authentication and cookie-based authentication.
Command Line Client
The command line client uses primarily basic authentication. When using the client, you must supply your SlipStream username and password either via environmental variables or via command line options.
The environmental variables to set are:
$ export SLIPSTREAM_USERNAME=ssuser
$ export SLIPSTREAM_PASSWORD=sspass
substituting the ssuser and sspass values with your own
username and password. You can also set these values explicitly on
the command line with the -u or --username options for the
username and with the -p or --password options for the
password.
You can quickly test the authentication by listing your user account information:
$ ss-user-get ssuser
again changing ssuser to your username. This should return an XML
representation of your user account.
cURL
It is strongly recommended to use cookie-based authentication when using the REST API. The basic authentication method is deprecated and will be removed at some point in the near future.
To obtain a valid authentication cookie, you must login to SlipStream, much like you’d do with the web interface. To do this, create a “session create” document like the following:
{
  "sessionTemplate": {
     "href": "session-template/internal",
     "username" : "your-username",
     "password" : "your-password"
  }
}
substituting your-username and your-password with your actual
username and password. Name the file something like
session-create-internal.json.
You can then POST this document to the session resource collection to create a new session and to recover an authentication cookie.
Doing this with cURL (and the alias defined above!):
$ ss-curl https://nuv.la/api/session \
    -D - \
    -o /dev/null \
    -XPOST \
    -H content-type:application/json \
    -d@session-create-internal.json
This should return only the headers from the response, which should
include a “Set-Cookie” header with a value and a “201 created”
response code. The cookie should also end up in the ~/cookies
file.
If you provide the wrong credentials, you will get a “403 forbidden” response.
The “internal” login method is always available. You may also be able to log in via another method. You can find the full list of available methods by listing the Session Template resources:
$ ss-curl https://nuv.la/api/session-template
Note that external methods (e.g. GitHub) may not support login workflows that are adapted to command line interactions.
Advanced REST Client
Doing this with the Advanced REST Client in Chrome, you can fill in the form for the login request, which should look like the following screenshot.
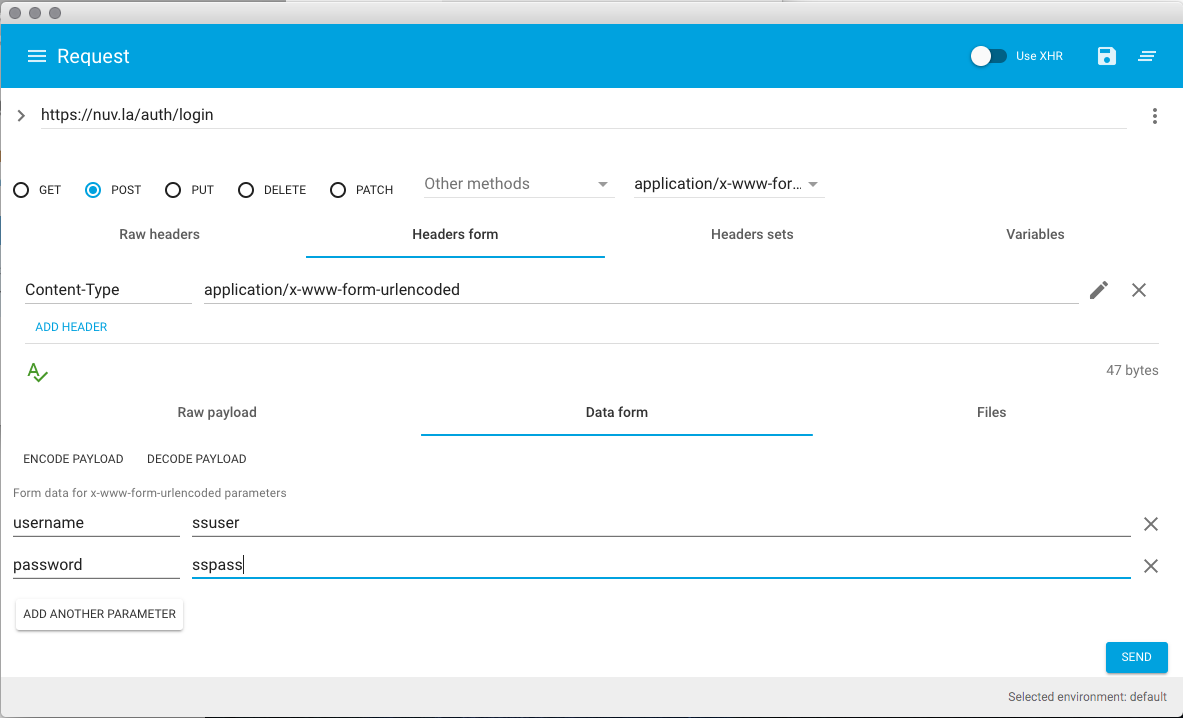
and which should return something like the following screenshot.
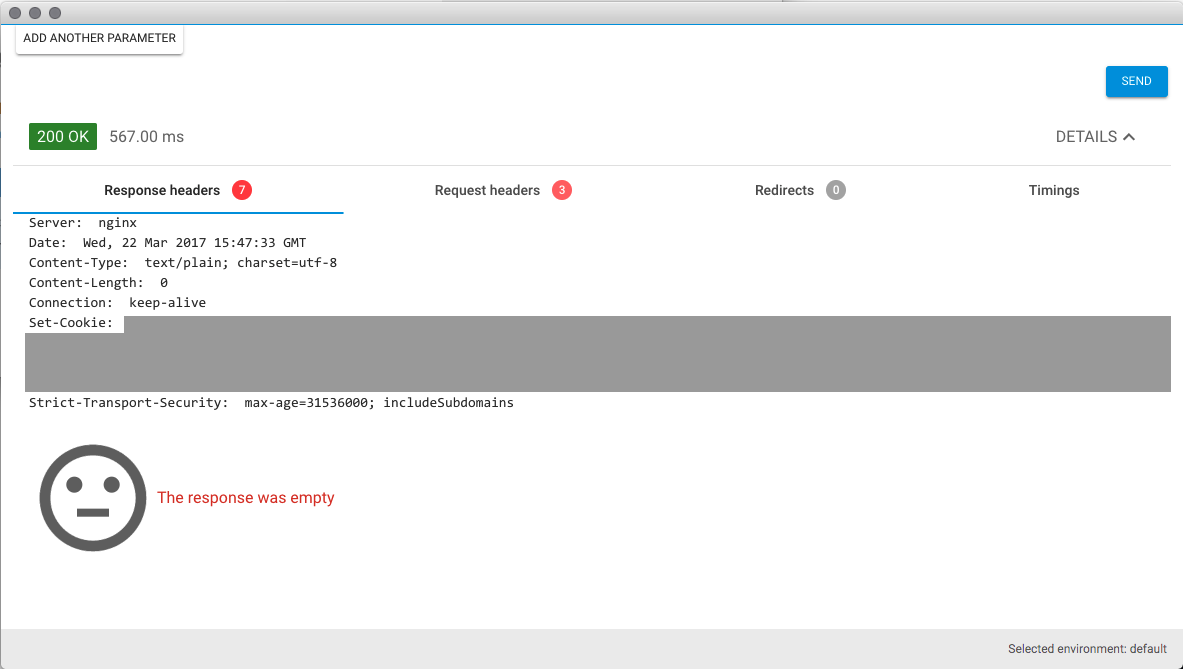
As for cURL, the “Set-Cookie” header should have a value. To automatically
reuse the cookie for the next requests in the Advanced REST Client, you need to
have the ARC cookie exchange extension installed and enabled in Chrome and also
enabled in ARC: in the right corner the Use XHR should be turned on.
Note
If you want to logout by destroying your access cookie, then you can either delete the cookie manually or send a HTTP DELETE request to the logout resource http://nuv.la./logout.
Managing an Application
Command Line Client
To deploy an application or a component via the command line client use the
ss-execute command. To deploy the web server and client
application defined earlier:
$ ss-execute --parameters="server:title=Great Title" \
             --kill-vms-on-error \
             Training-2015-11/nginx-test-app
This will return the URL of the created run.
This is essentially a “shoot and forget” feature intended for deploying test applications. There are no comparable commands for finding the application’s status or terminating it. Those actions either need to be done through the web interface or REST API.
cURL
The REST API allows complete control over the application lifecycle.
To start an application with cURL, you must use the following command:
$ ss-curl https://nuv.la/run \
  -X POST \
  -d refqname=Training-2015-11/nginx-test-app \
  -d keep-running=always \
  -d parameter--node--server--title='Great Title' \
  -H 'Accept: application/xml' \
  -D - \
  -o response-body.txt
This will send a POST request to the “run” resource to start an application. The “Location” header will contain the run identifier if the command completes successfully.
The command shows how parameter values are encoded for the REST API. You can also specify other parameters such as the “keep-running” value. The “refqname” is required as it identifies the application to run.
You can see the full state of the run by performing a GET request on the given run URL:
$ ss-curl https://nuv.la/run/815a8f66-fc9d-4444-849c-d12e883982c1
All of the responses related to the applications and runs are in XML. Newer resources such as events and usage are in JSON. All of the resources will eventually be migrating toward JSON in the future.
You can then terminate the run by sending a DELETE request to the given run URL:
$ ss-curl -X DELETE \
  https://nuv.la/run/815a8f66-fc9d-4444-849c-d12e883982c1
This will immediately terminate the application, so be careful when using DELETE requests.
Advanced REST Client
You can perform the same lifecycle with the Advanced REST Client. Start with deploying the application.
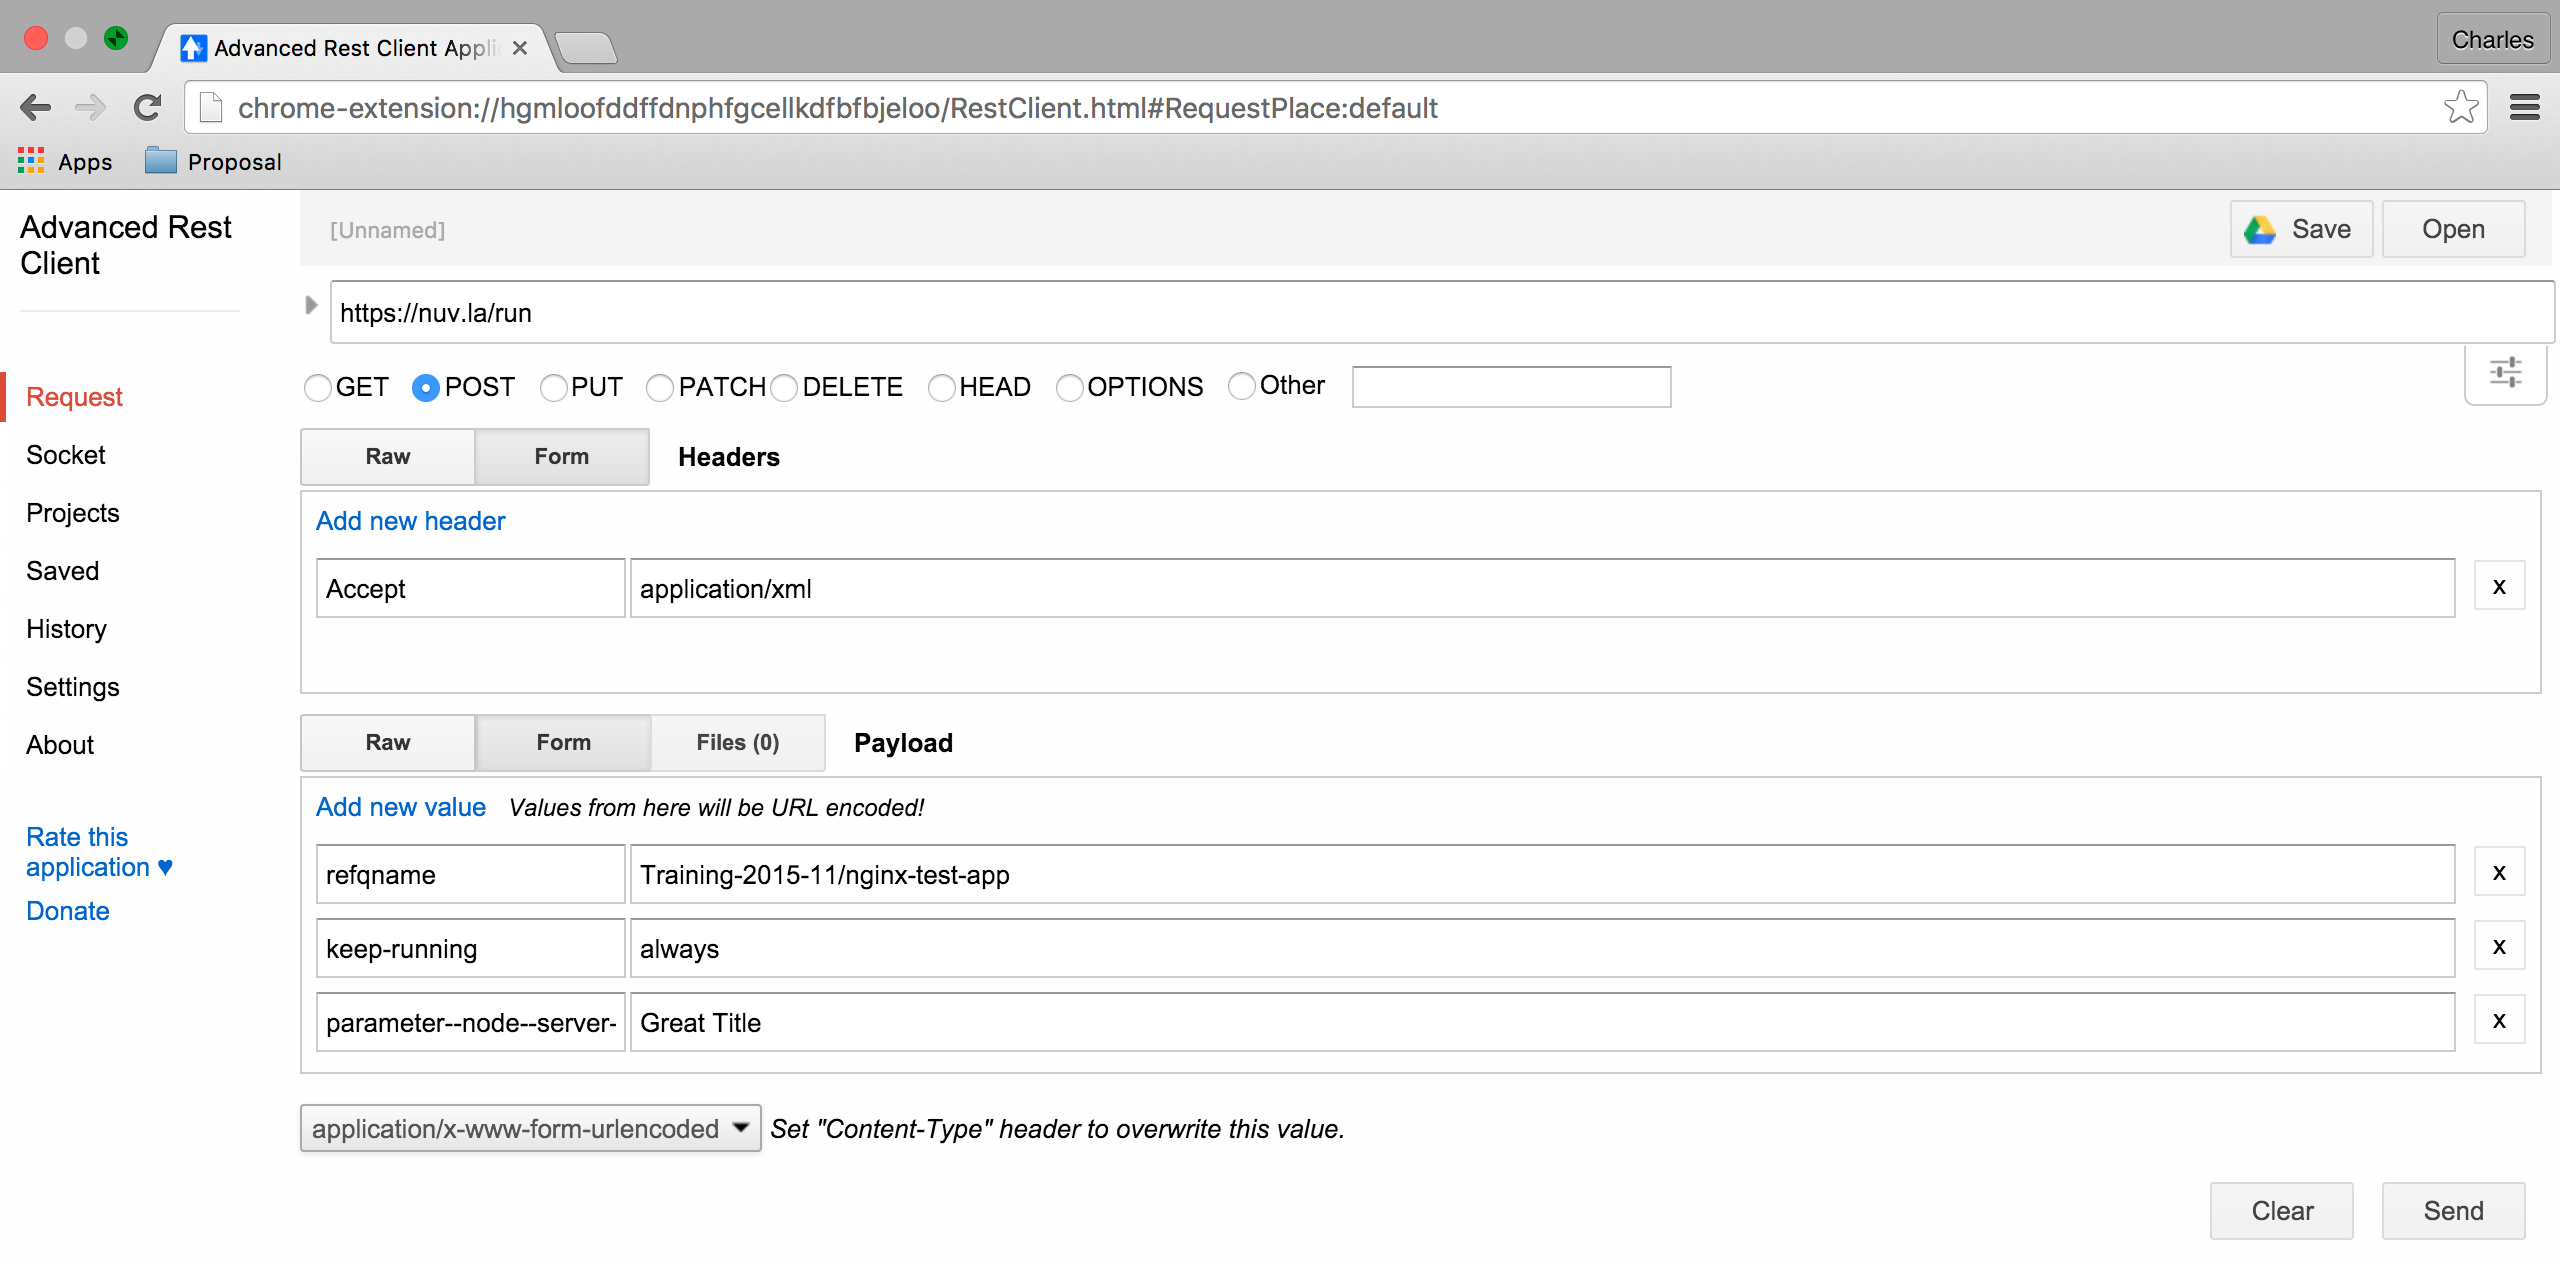
If successful, it will return a 201 response with the run identifier in the “Location” header.

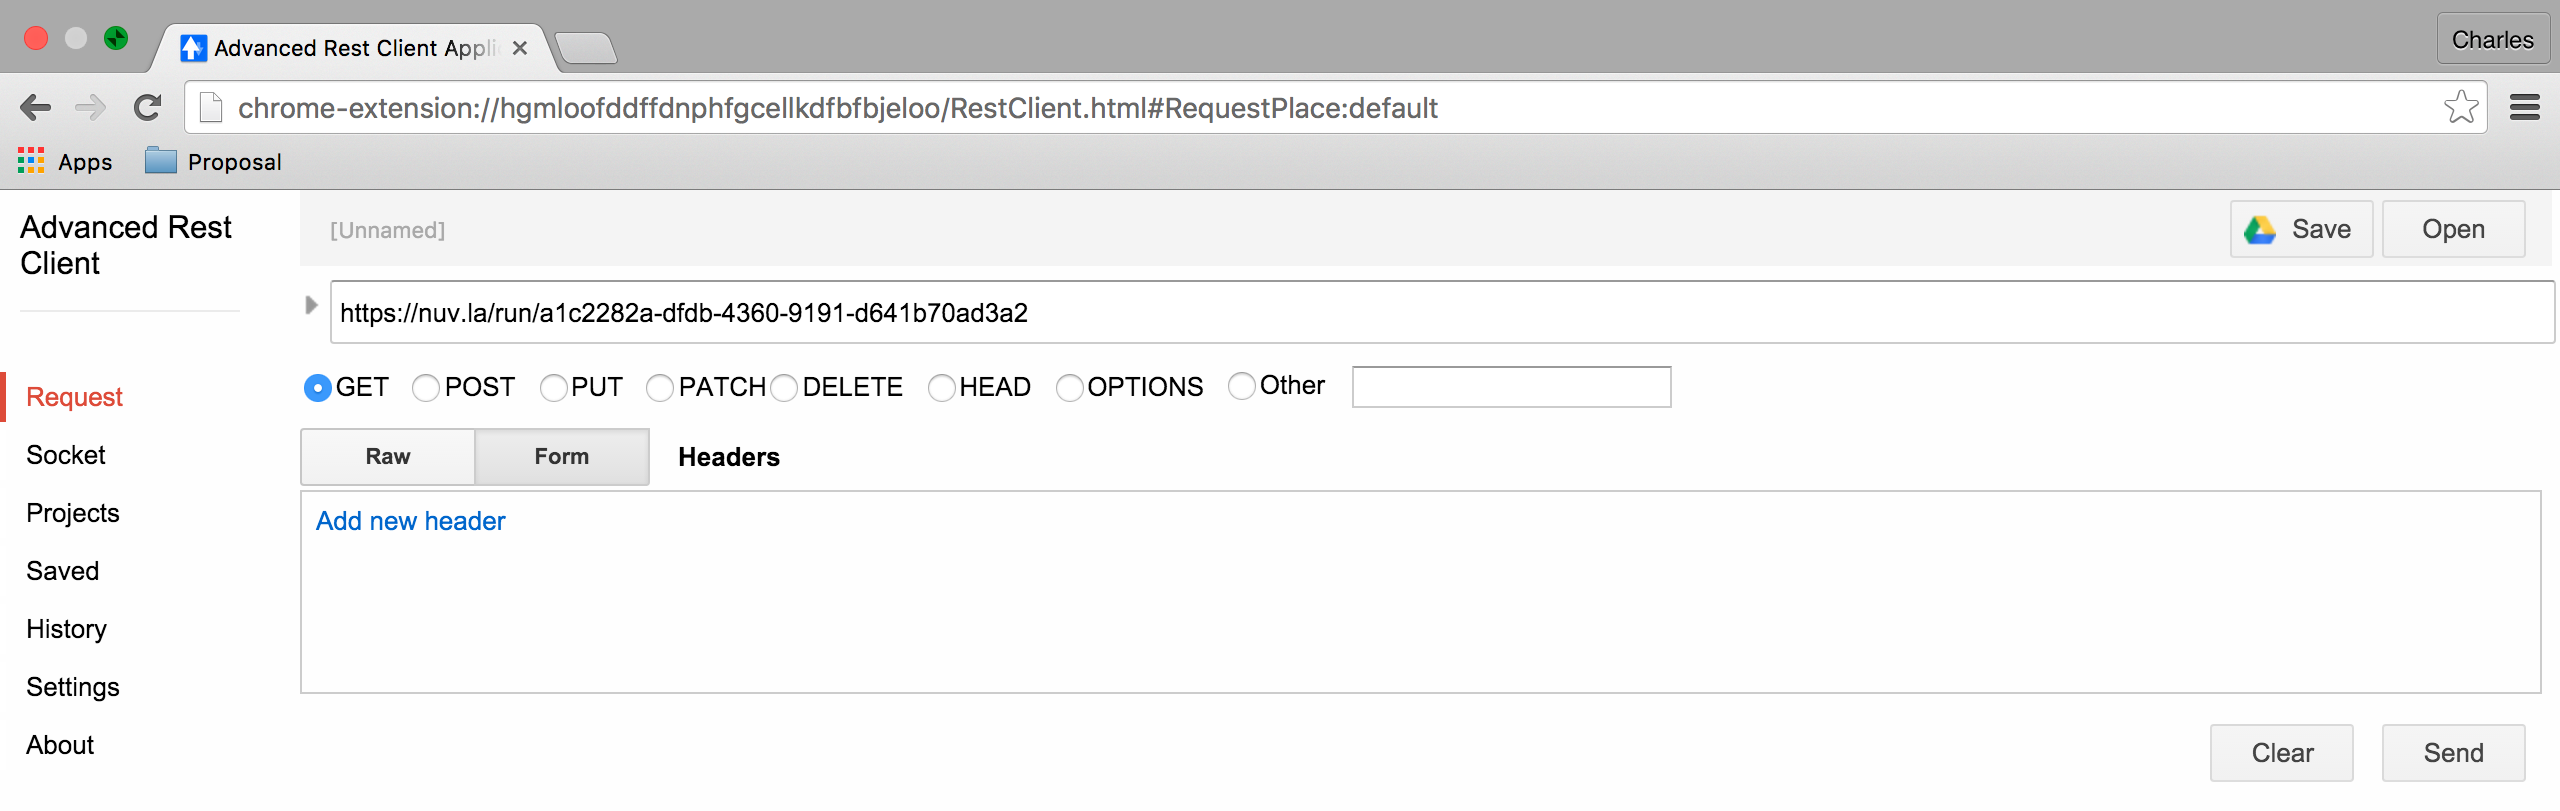
Performing a GET on the returned URL will give you the status.
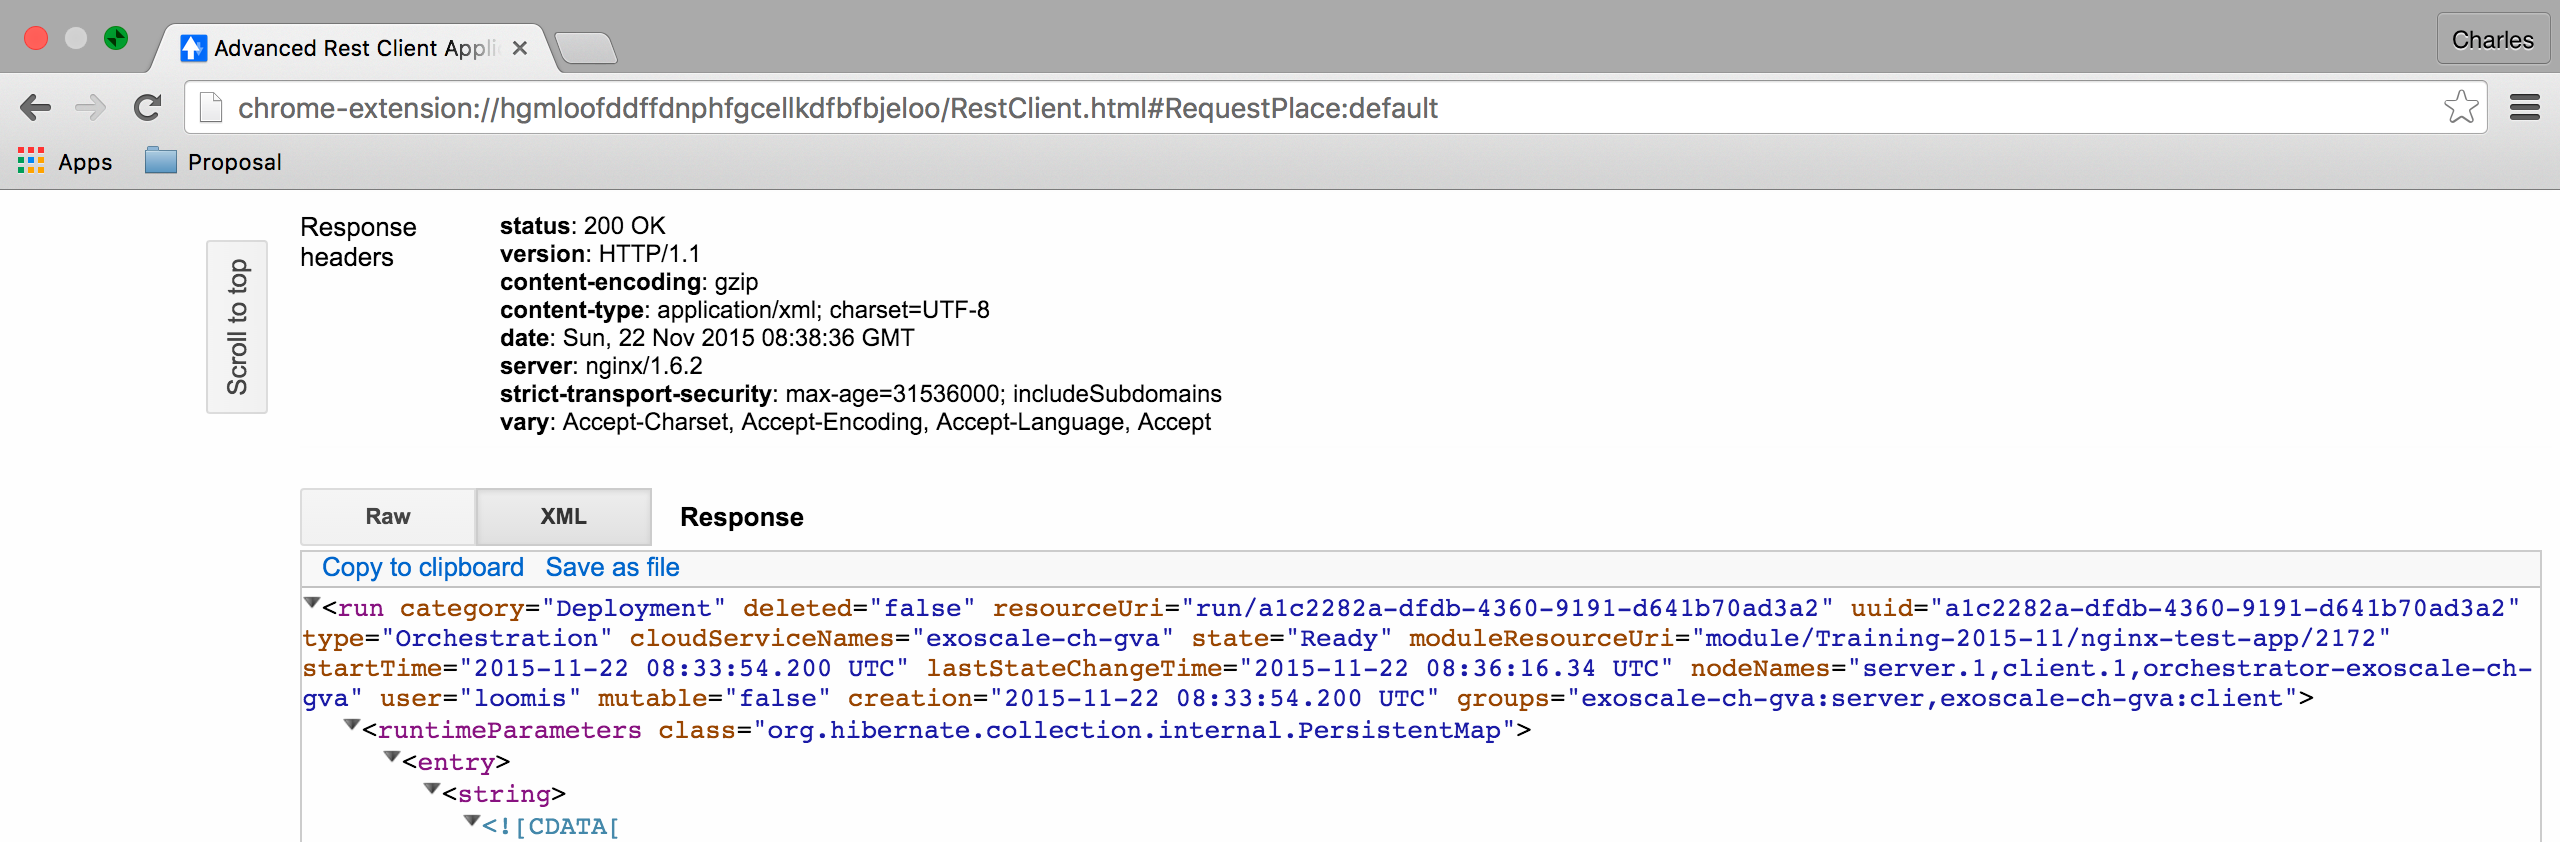
And finally the application can be terminated with a DELETE request.
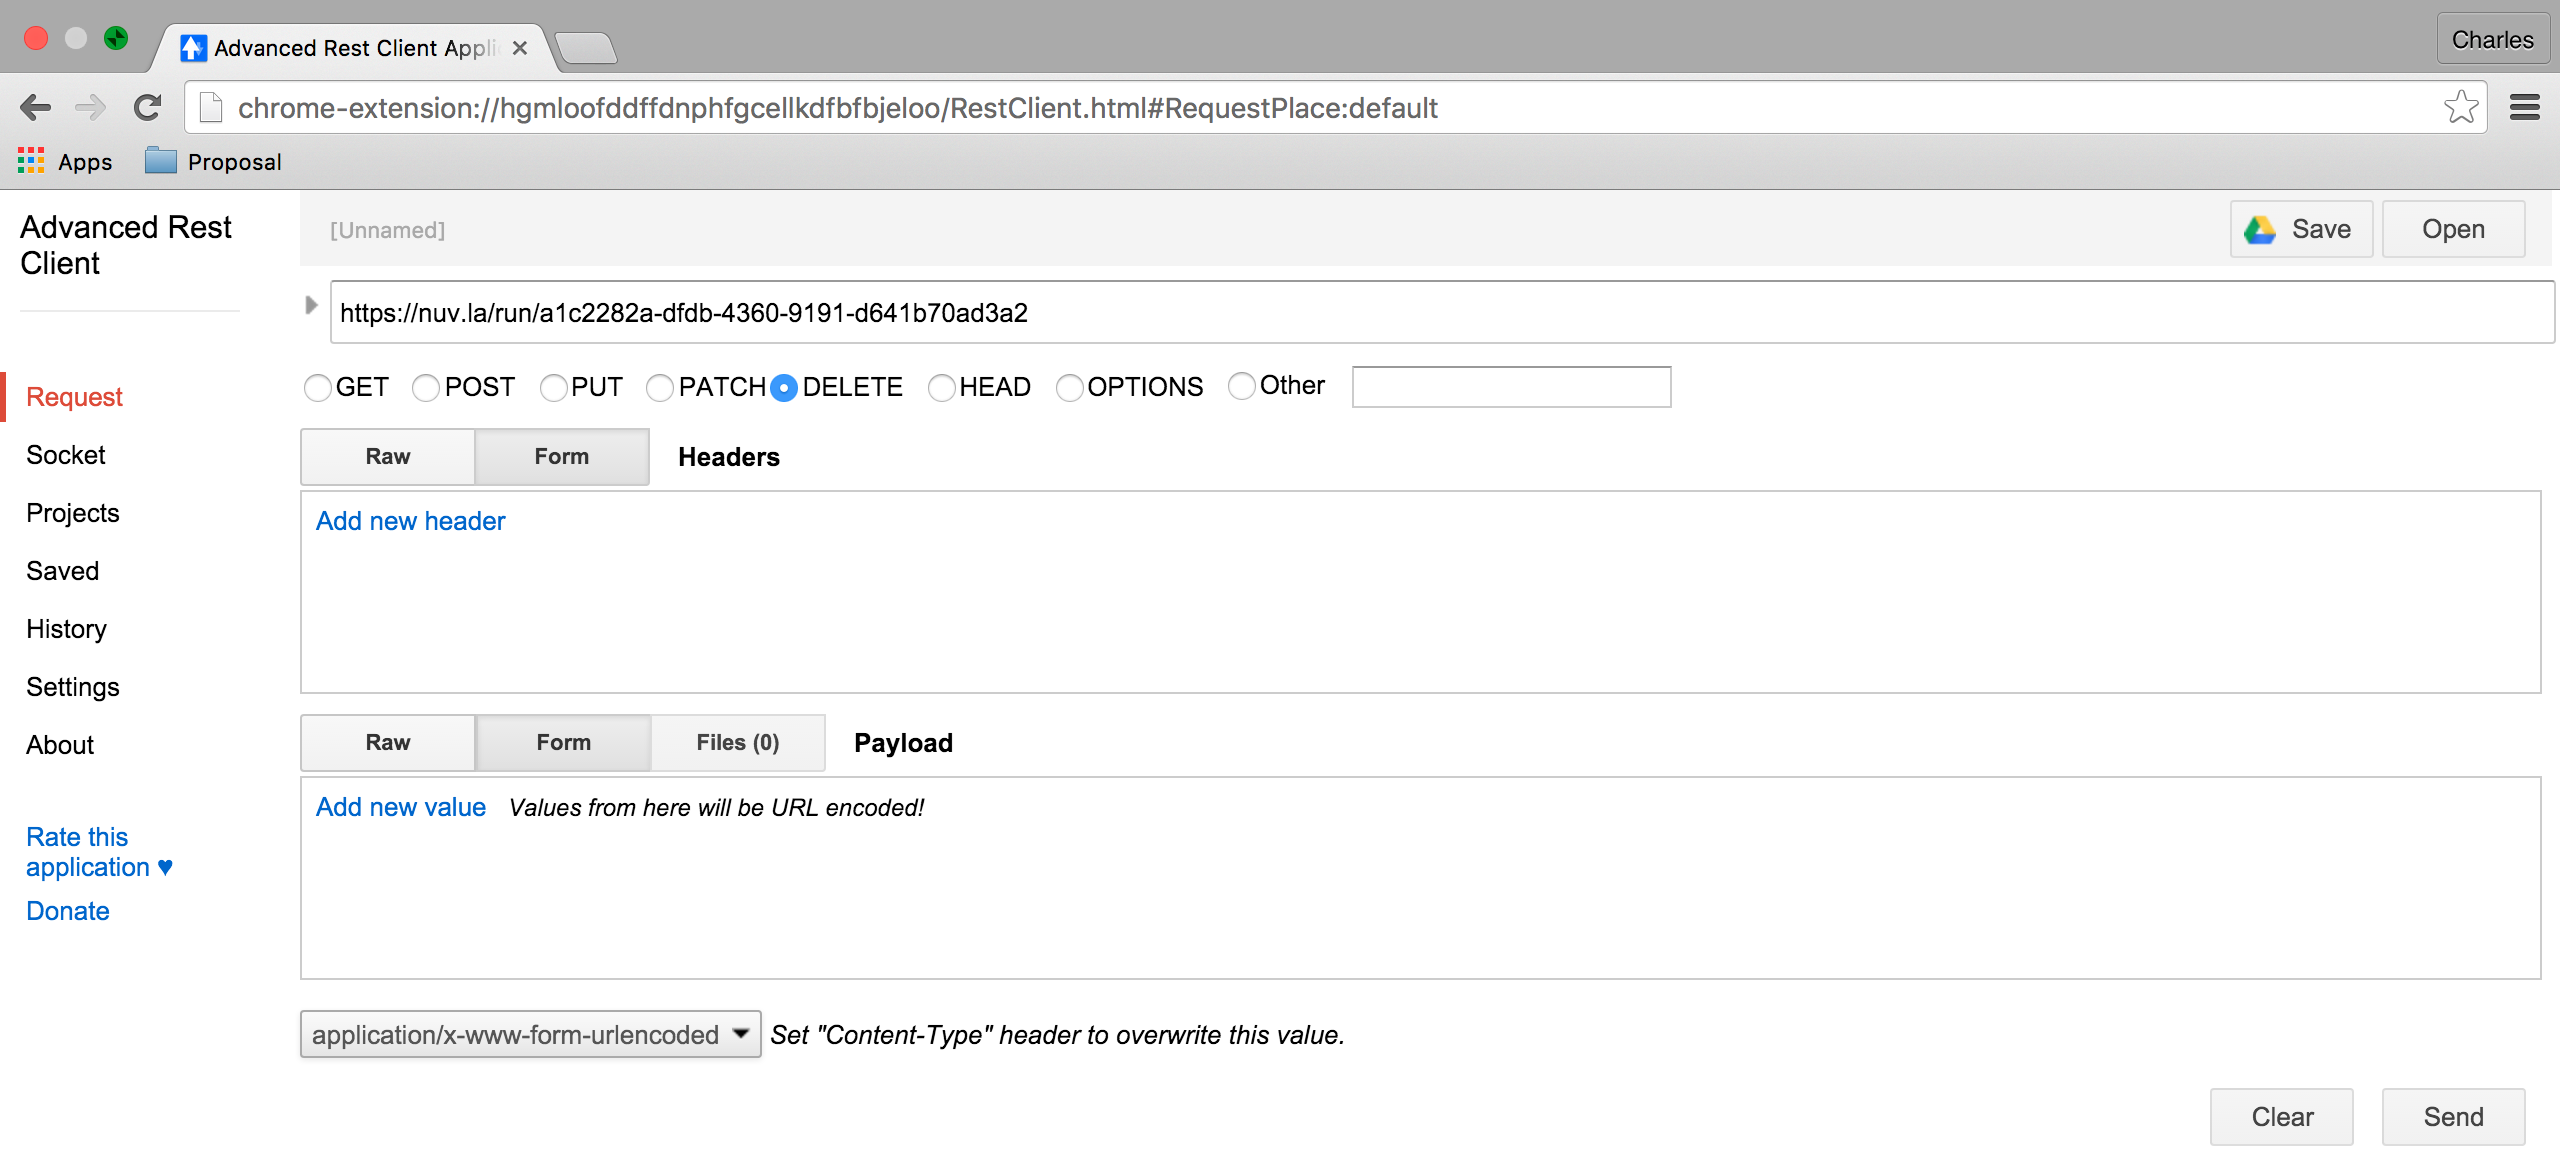
A successful termination will return a “No Content 204” response.

EXERCISES
- Start your web test application with the
ss-executecommand. - Perform a full lifecycle of your web test application with the REST API.
- Perform a full lifecycle of your web component with the REST API.